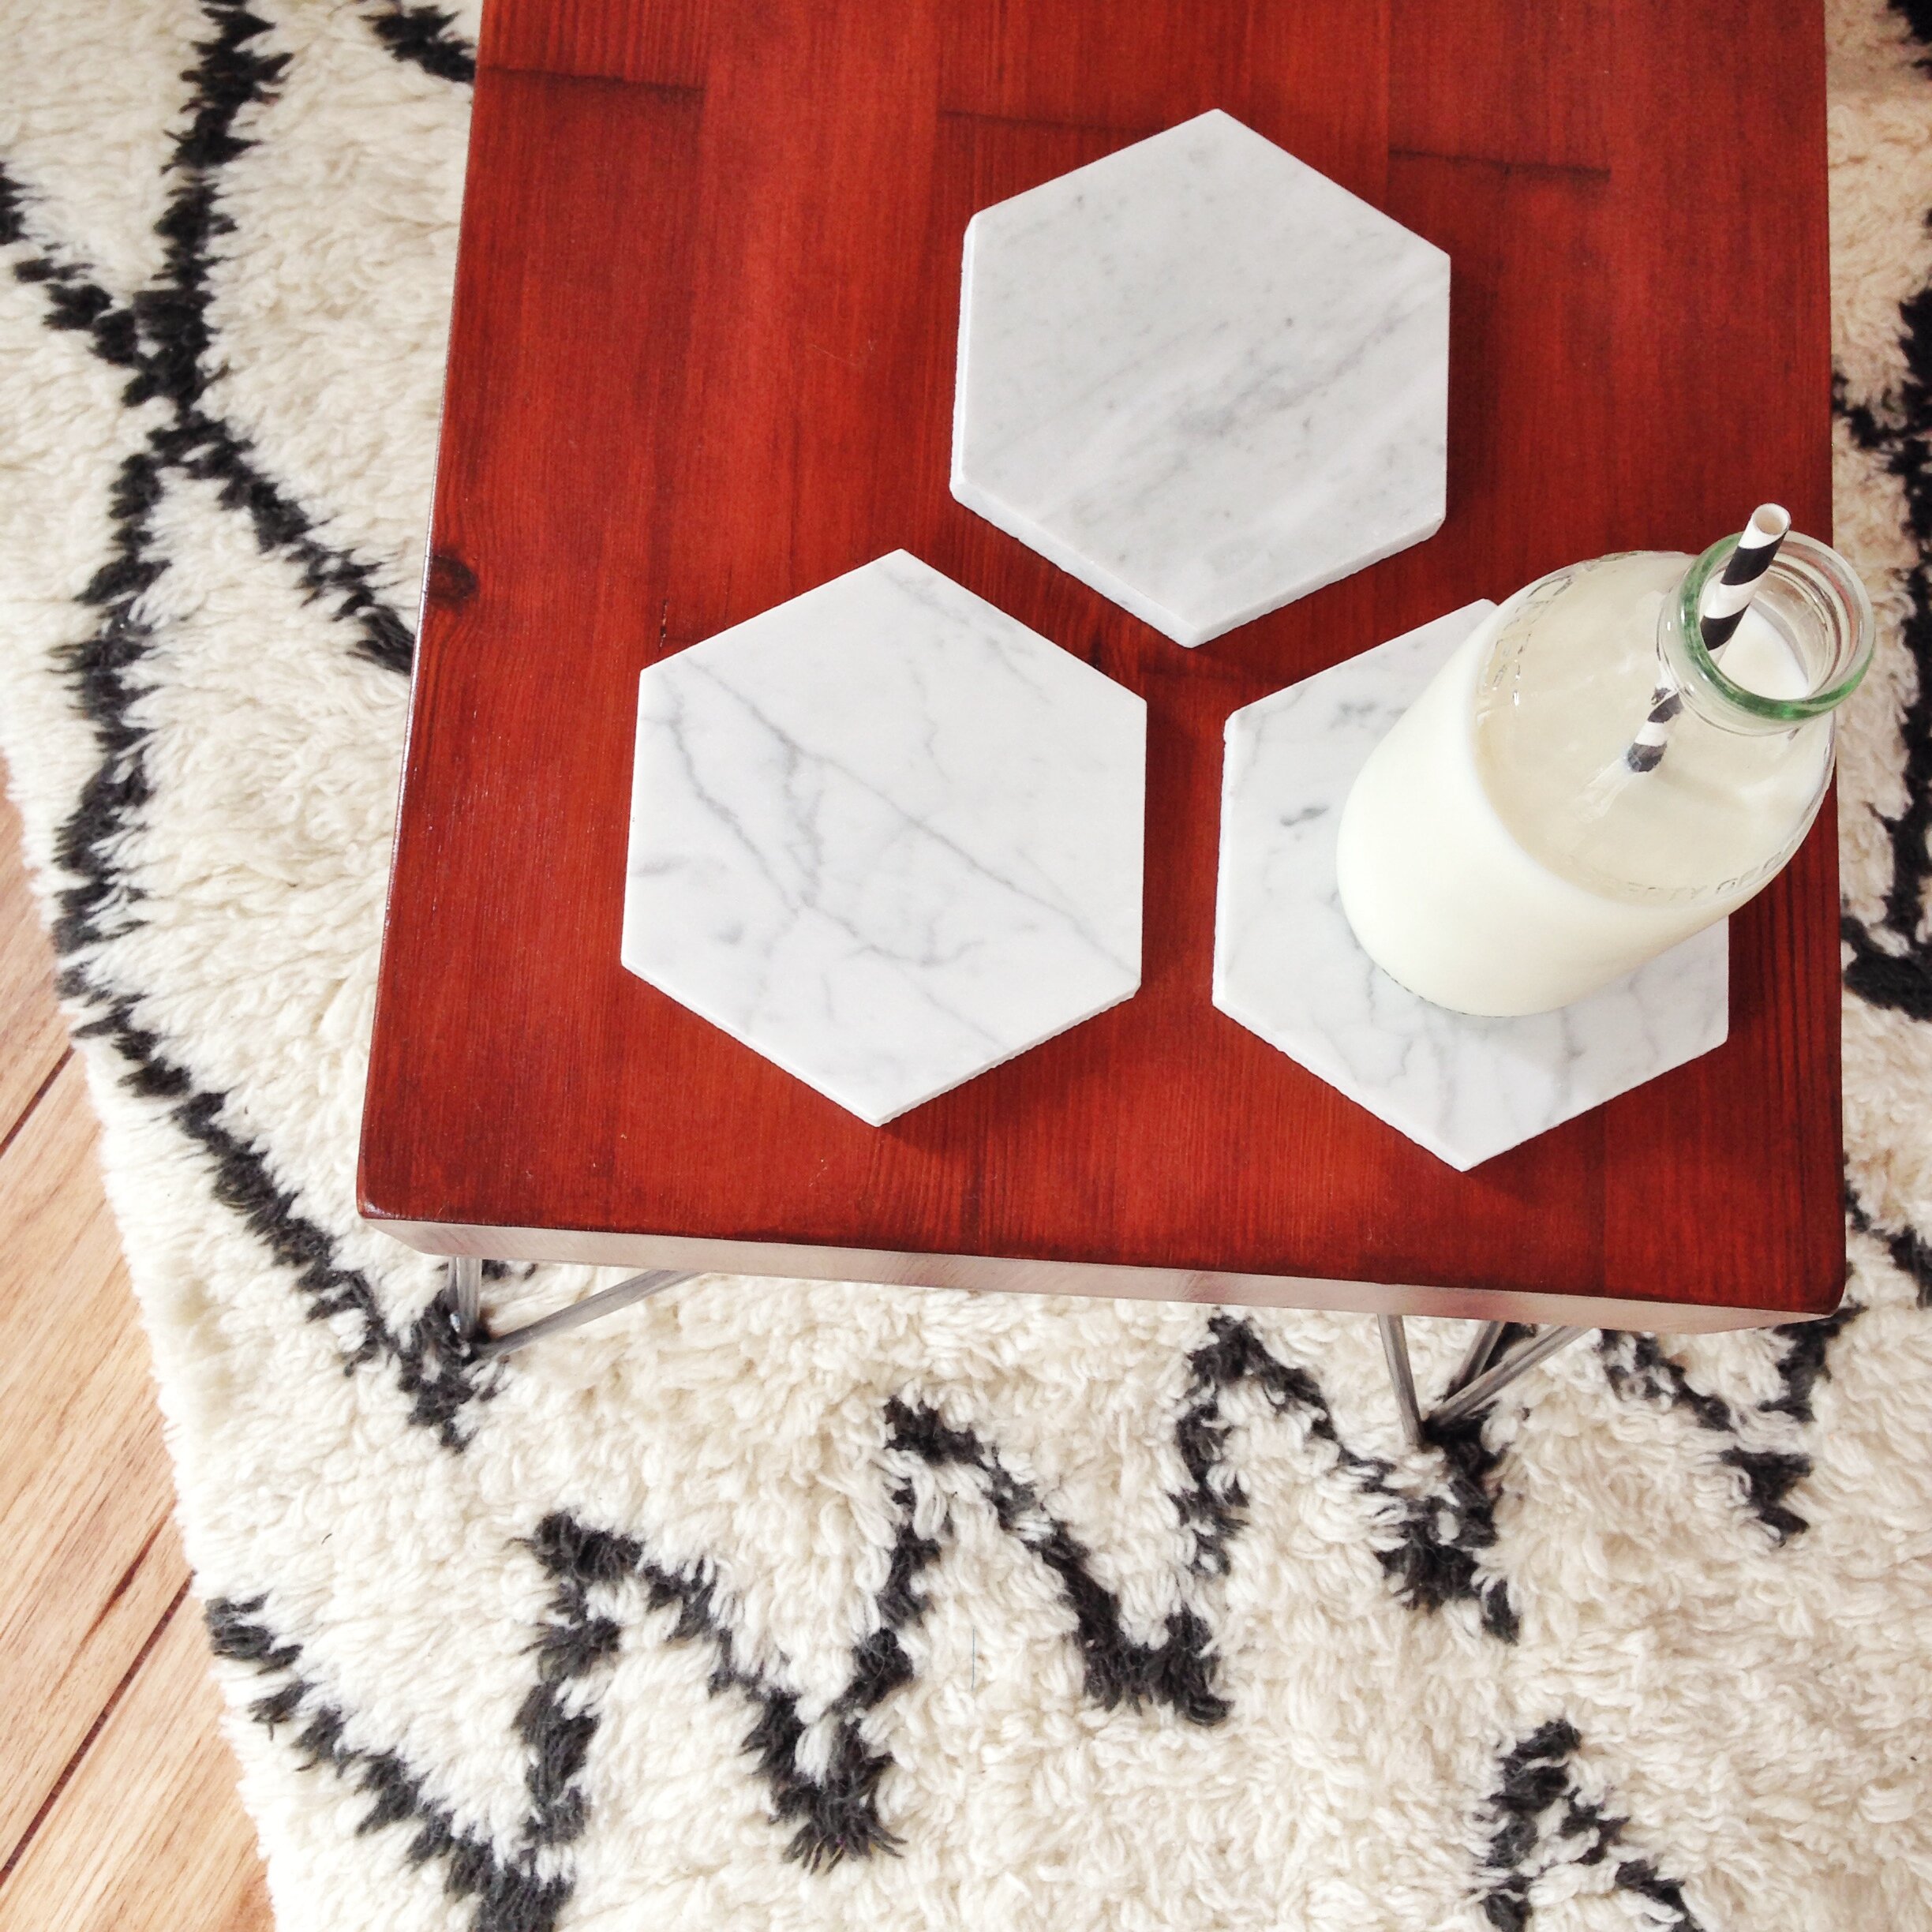
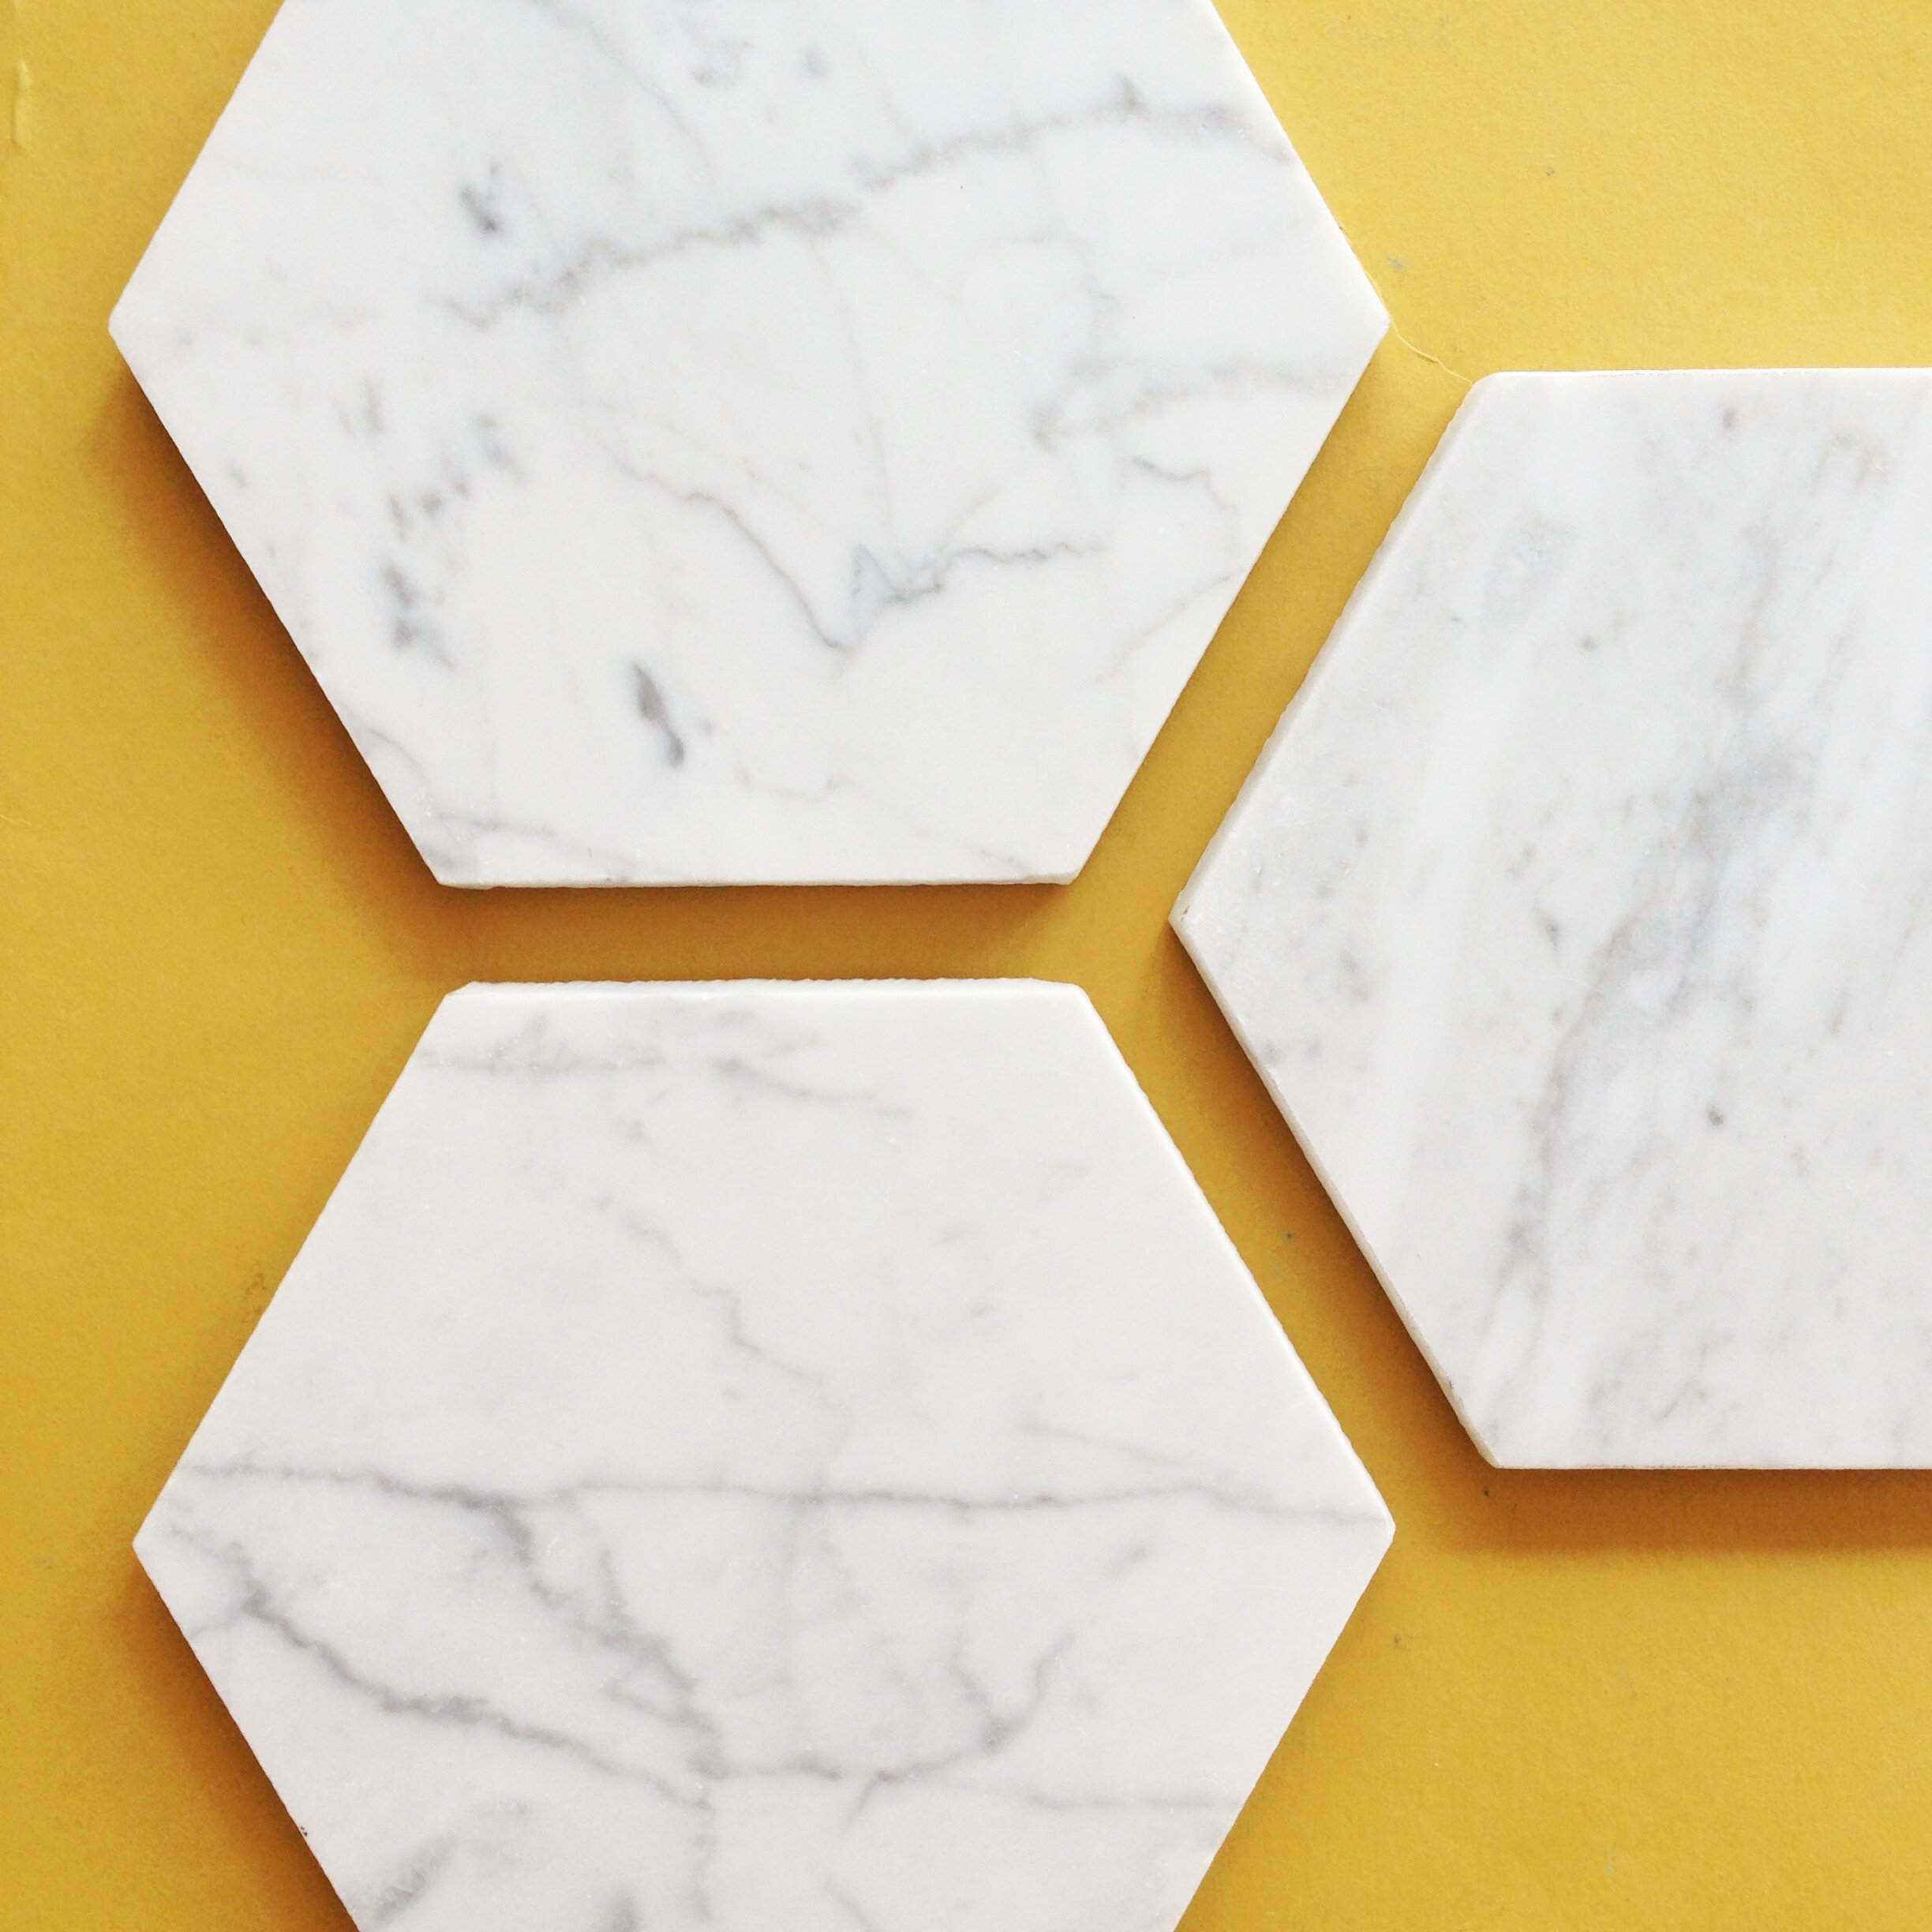
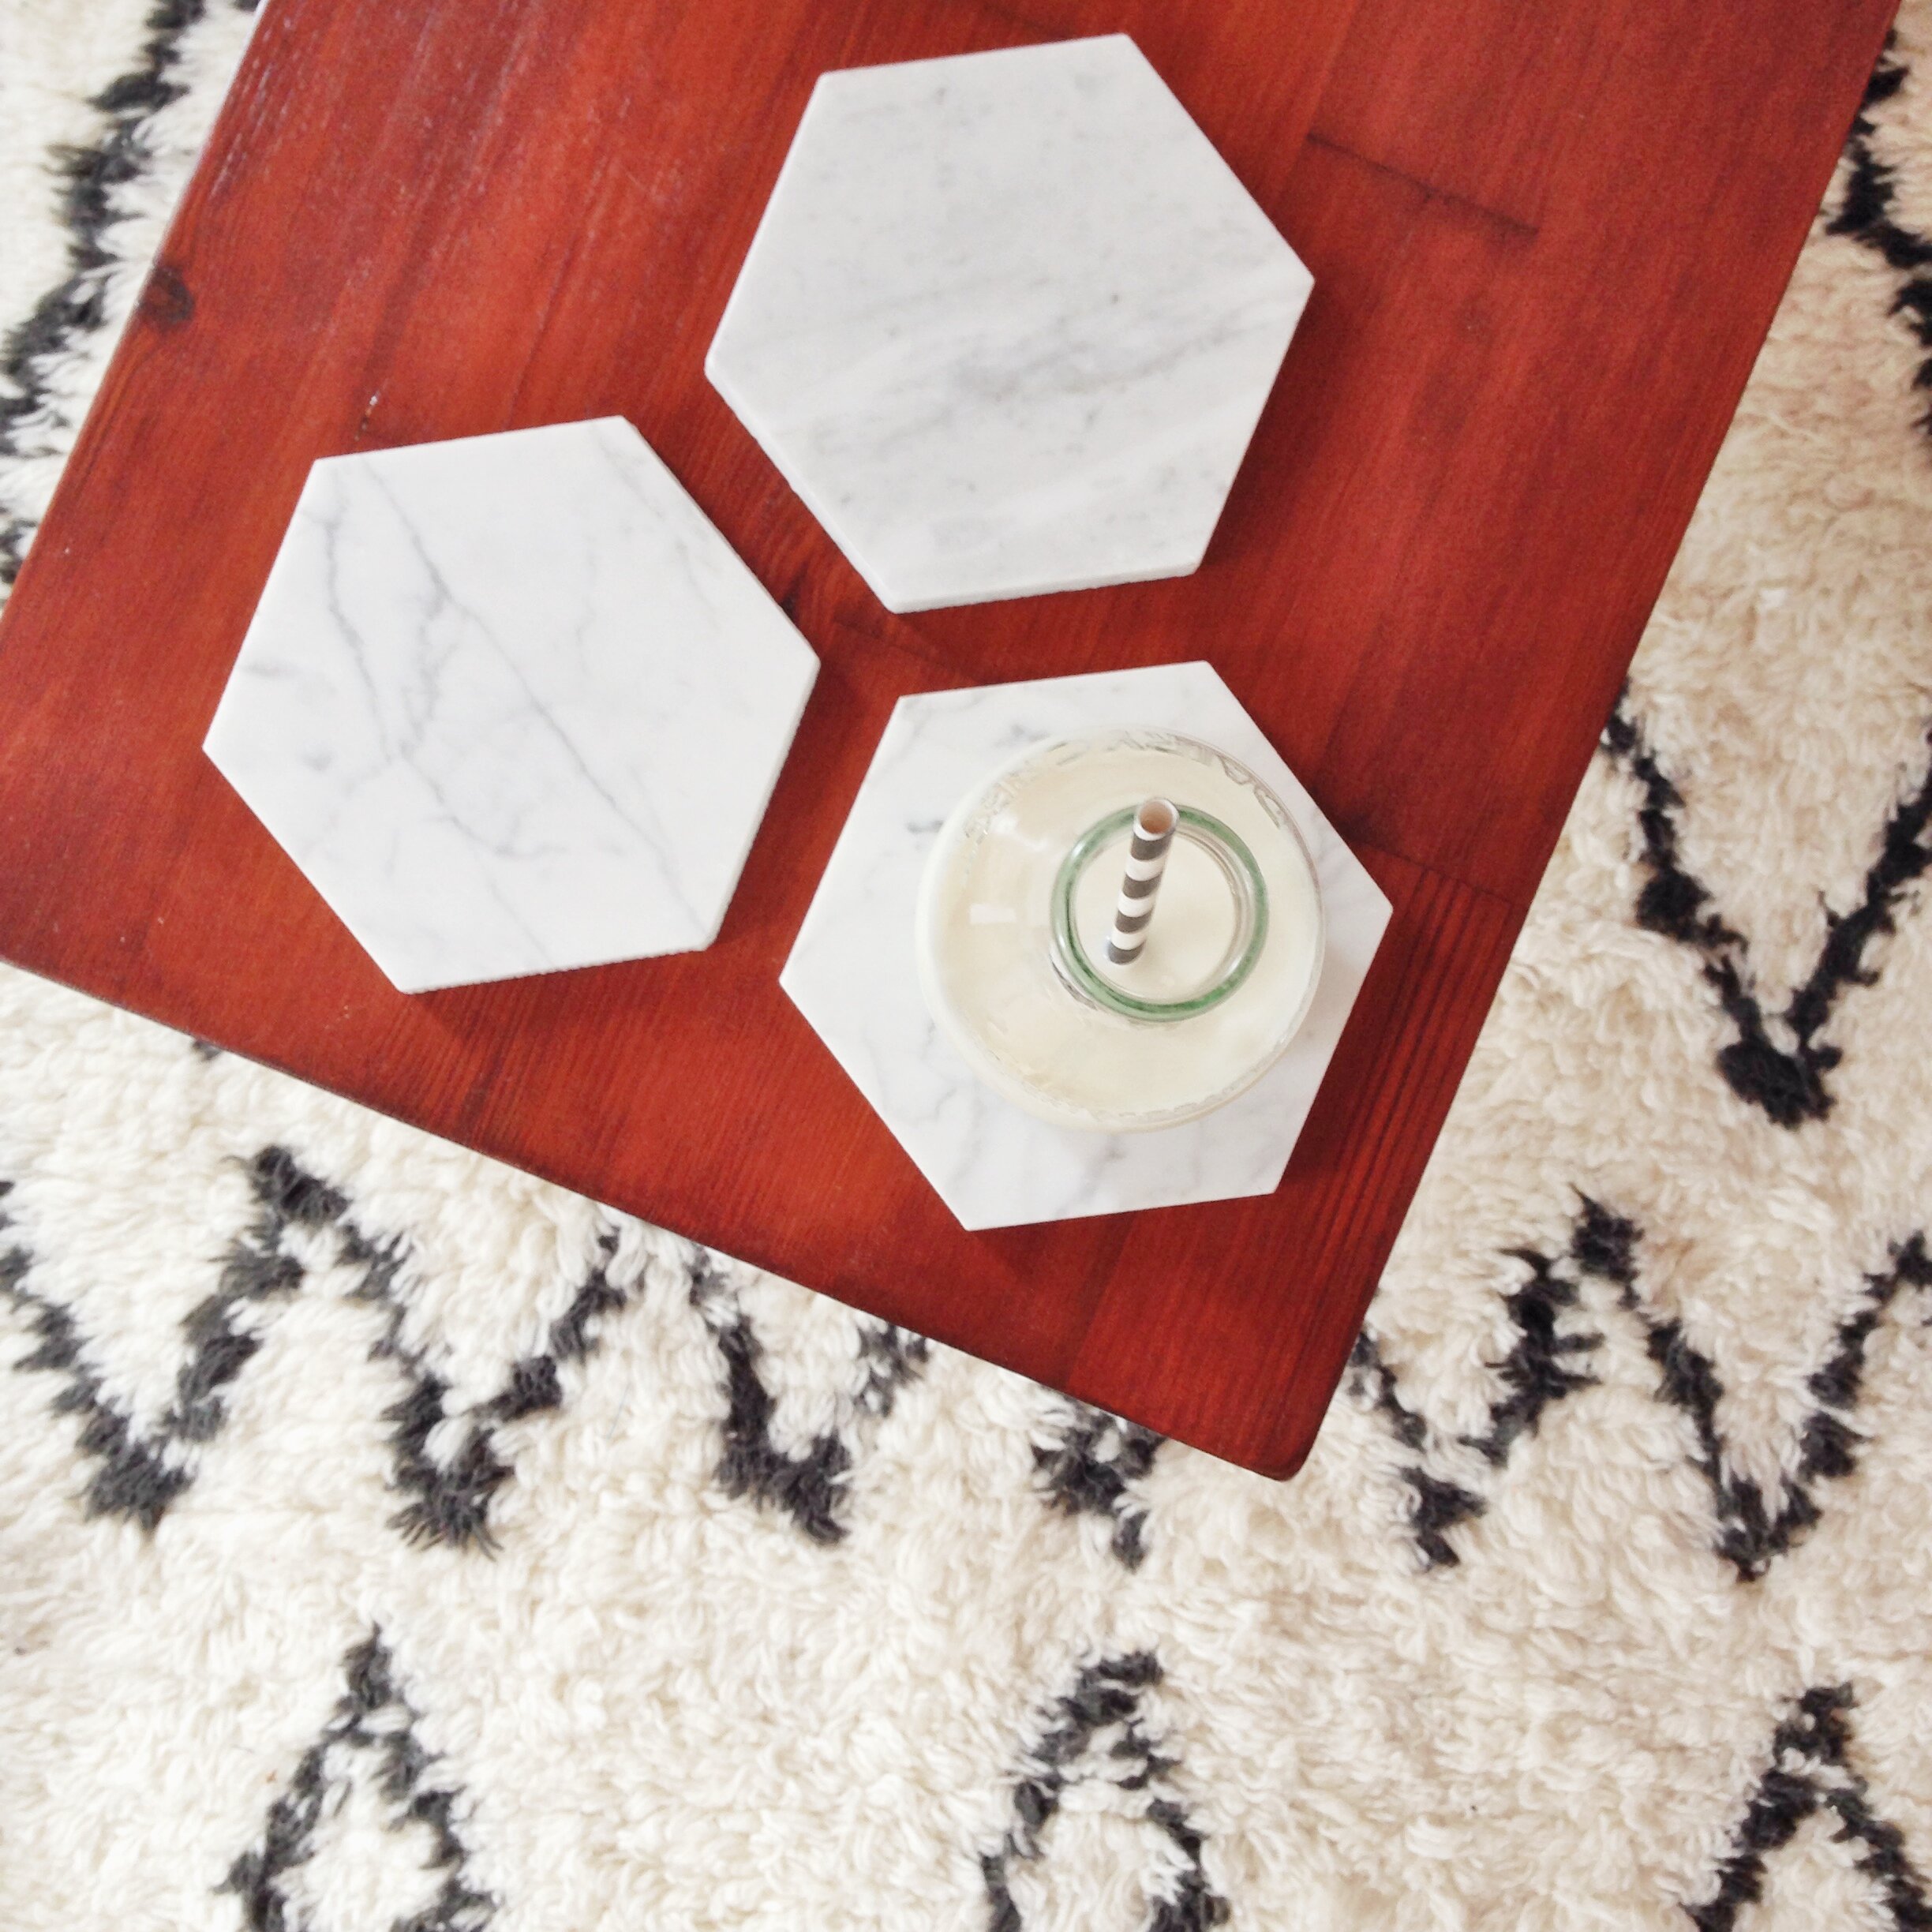
We recently found 4 hexagonal marble tiles (for free) and thought they’d be perfect as coasters. Now, we got our tiles for free but I’ve seen similar hexagonal tiles on eBay and there are plenty of marble choices available in B&Q and similar stores.
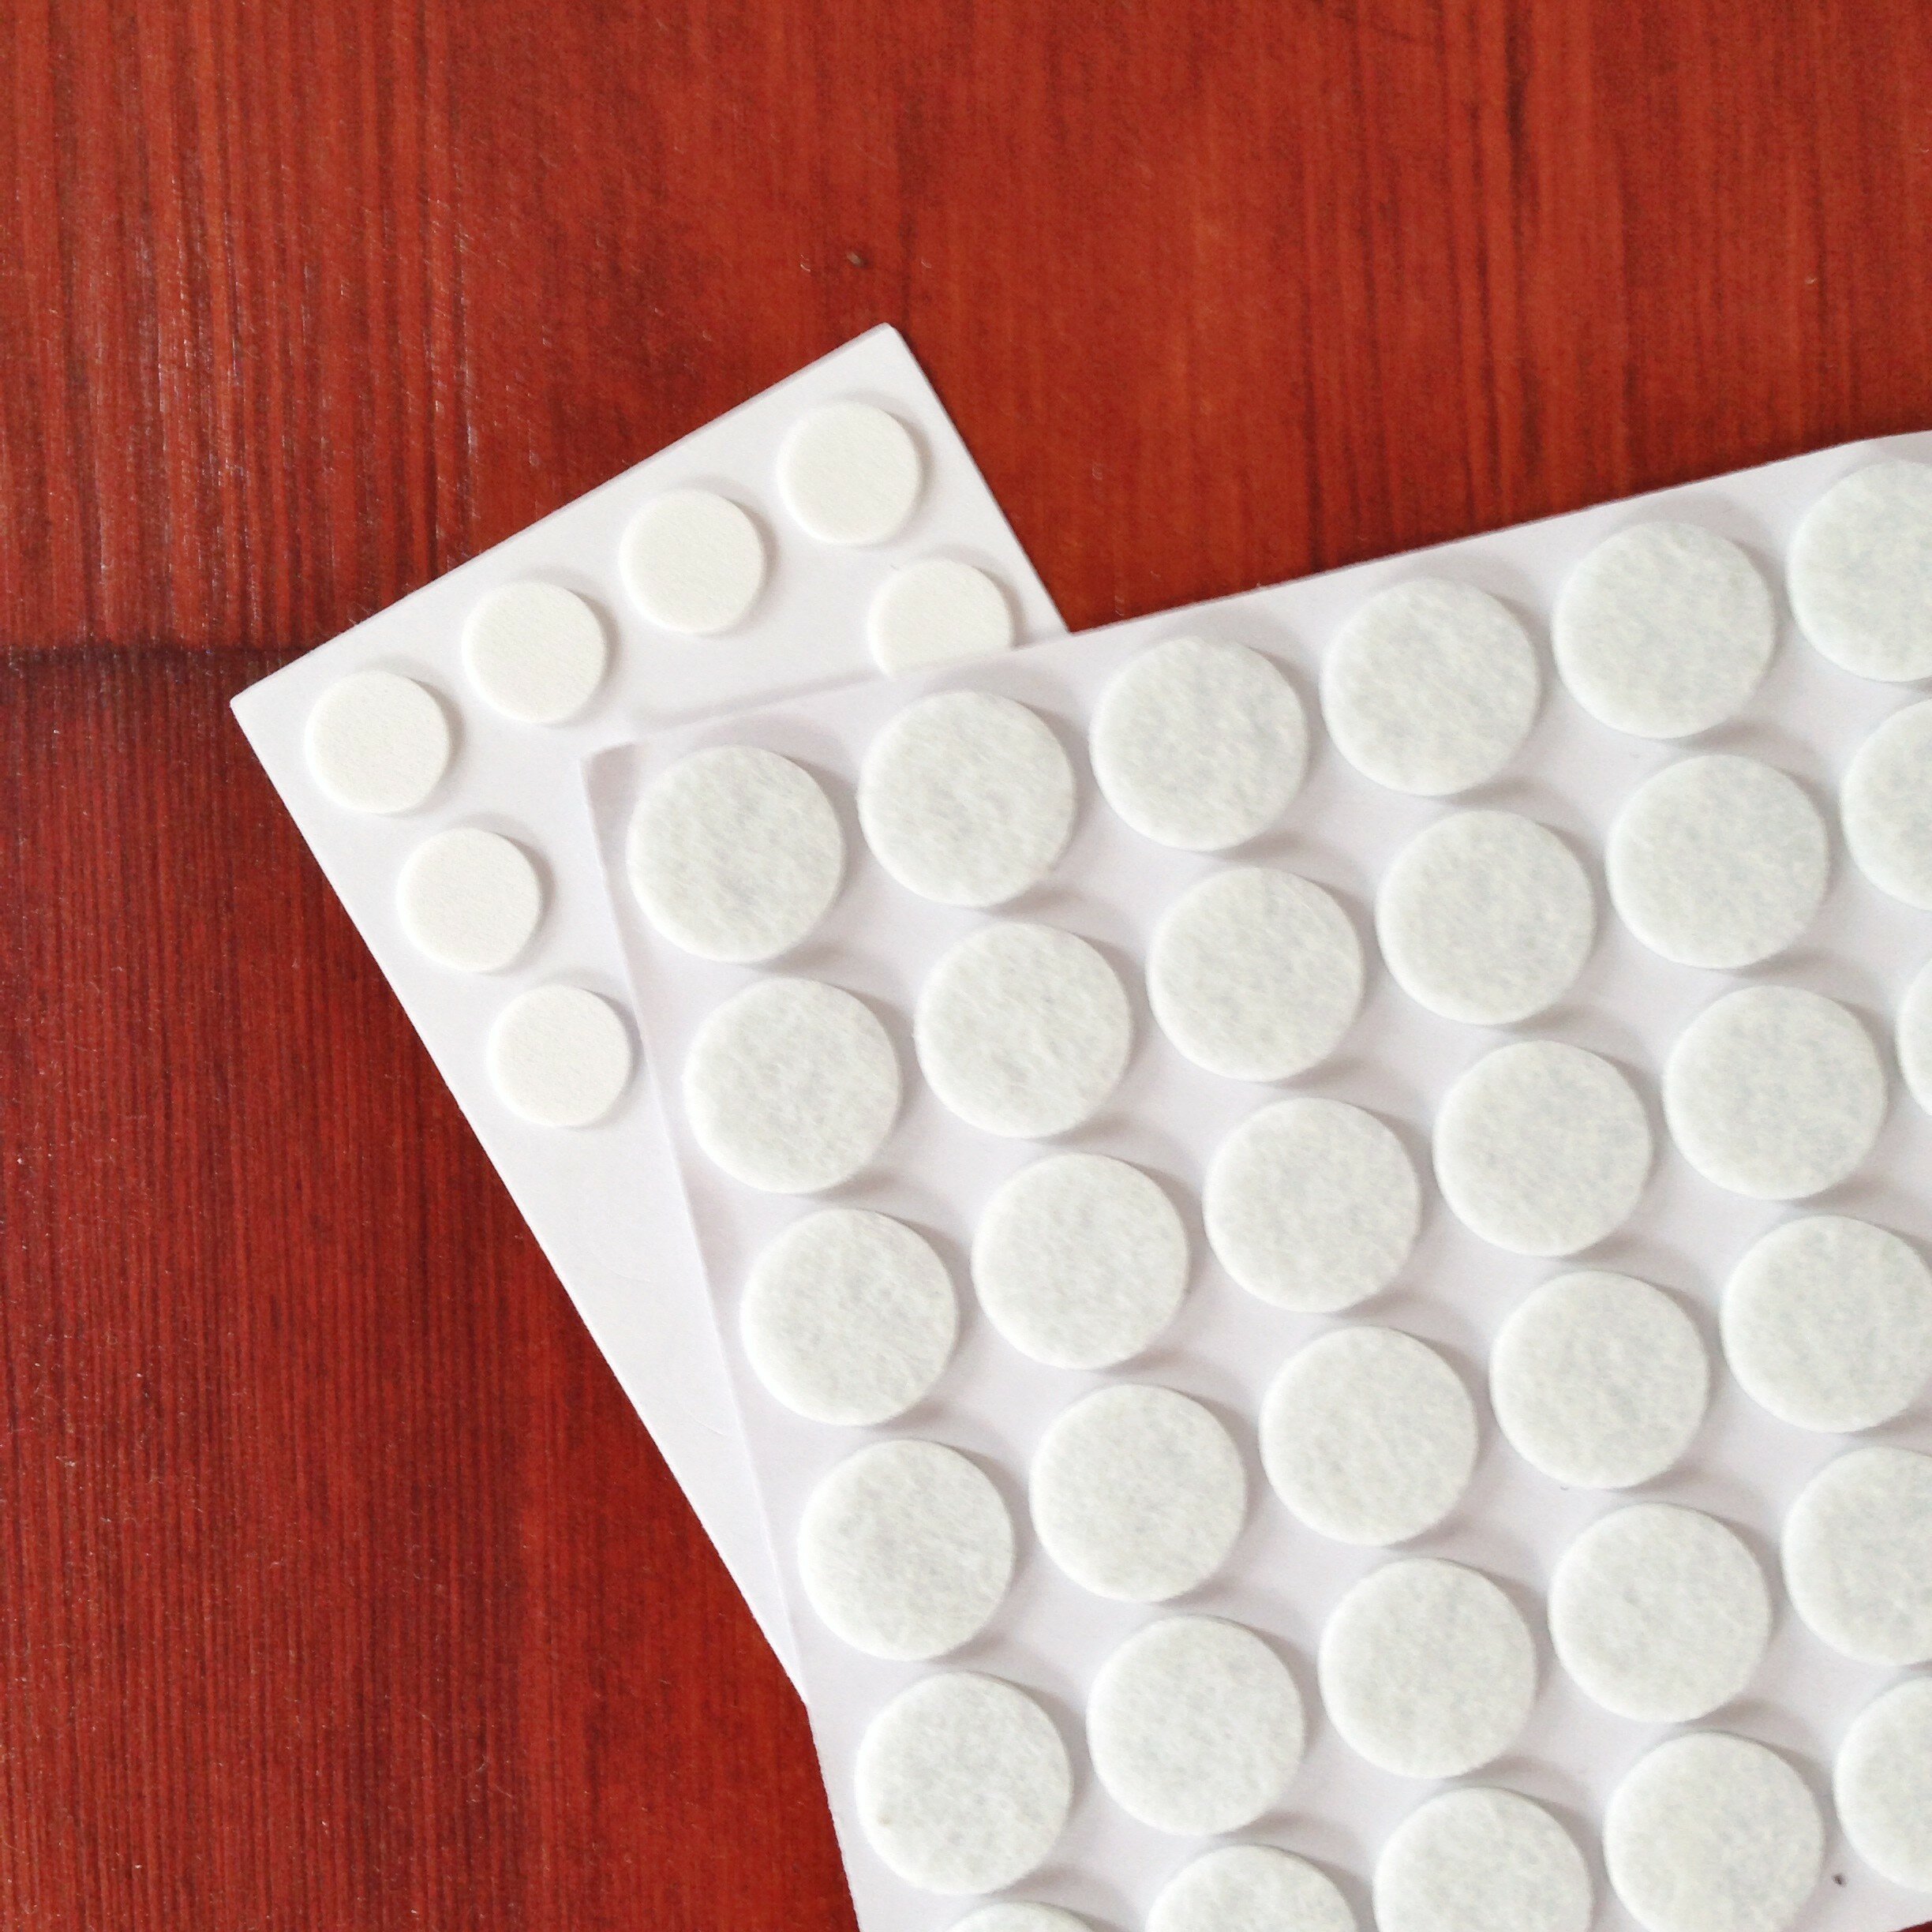
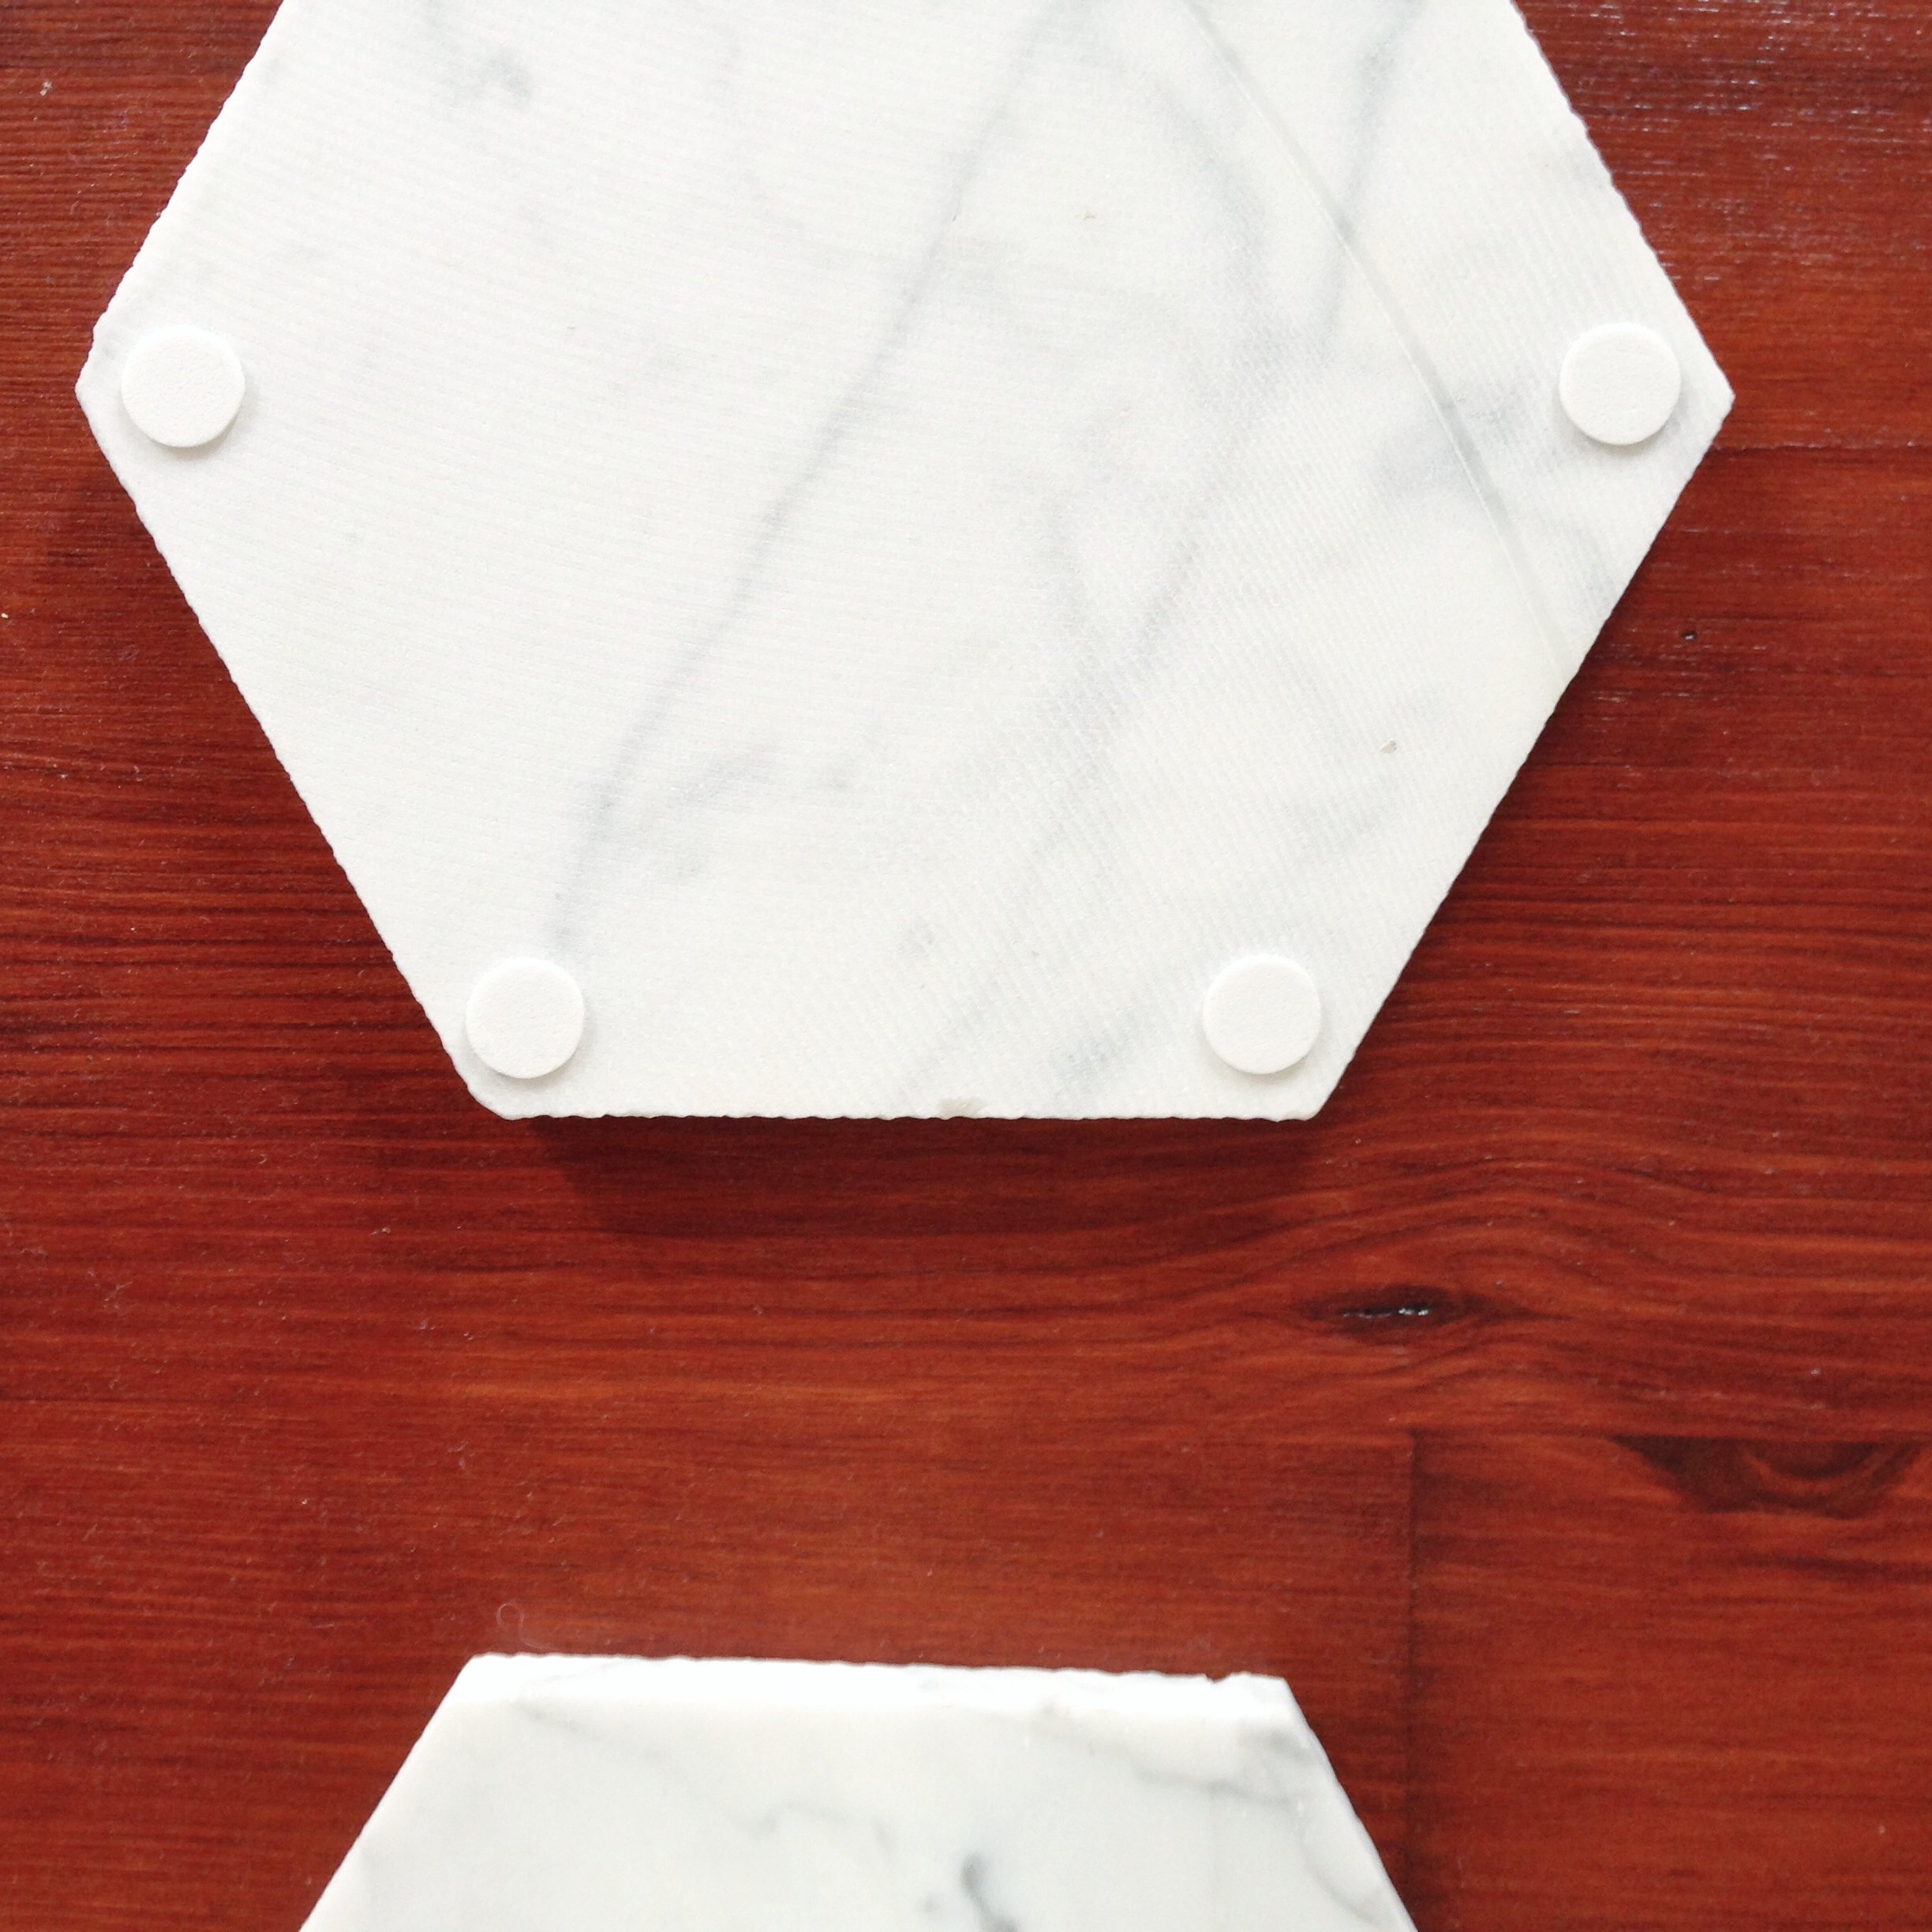
To protect our surfaces from the rougher underside of the tiles we put sctratch protector pads on each corner. The pads are from Poundland but again, you can find similar at any DIY/hardware shop. The project cost £1 in total and took around 3 minutes to complete. Easiest DIY ever!
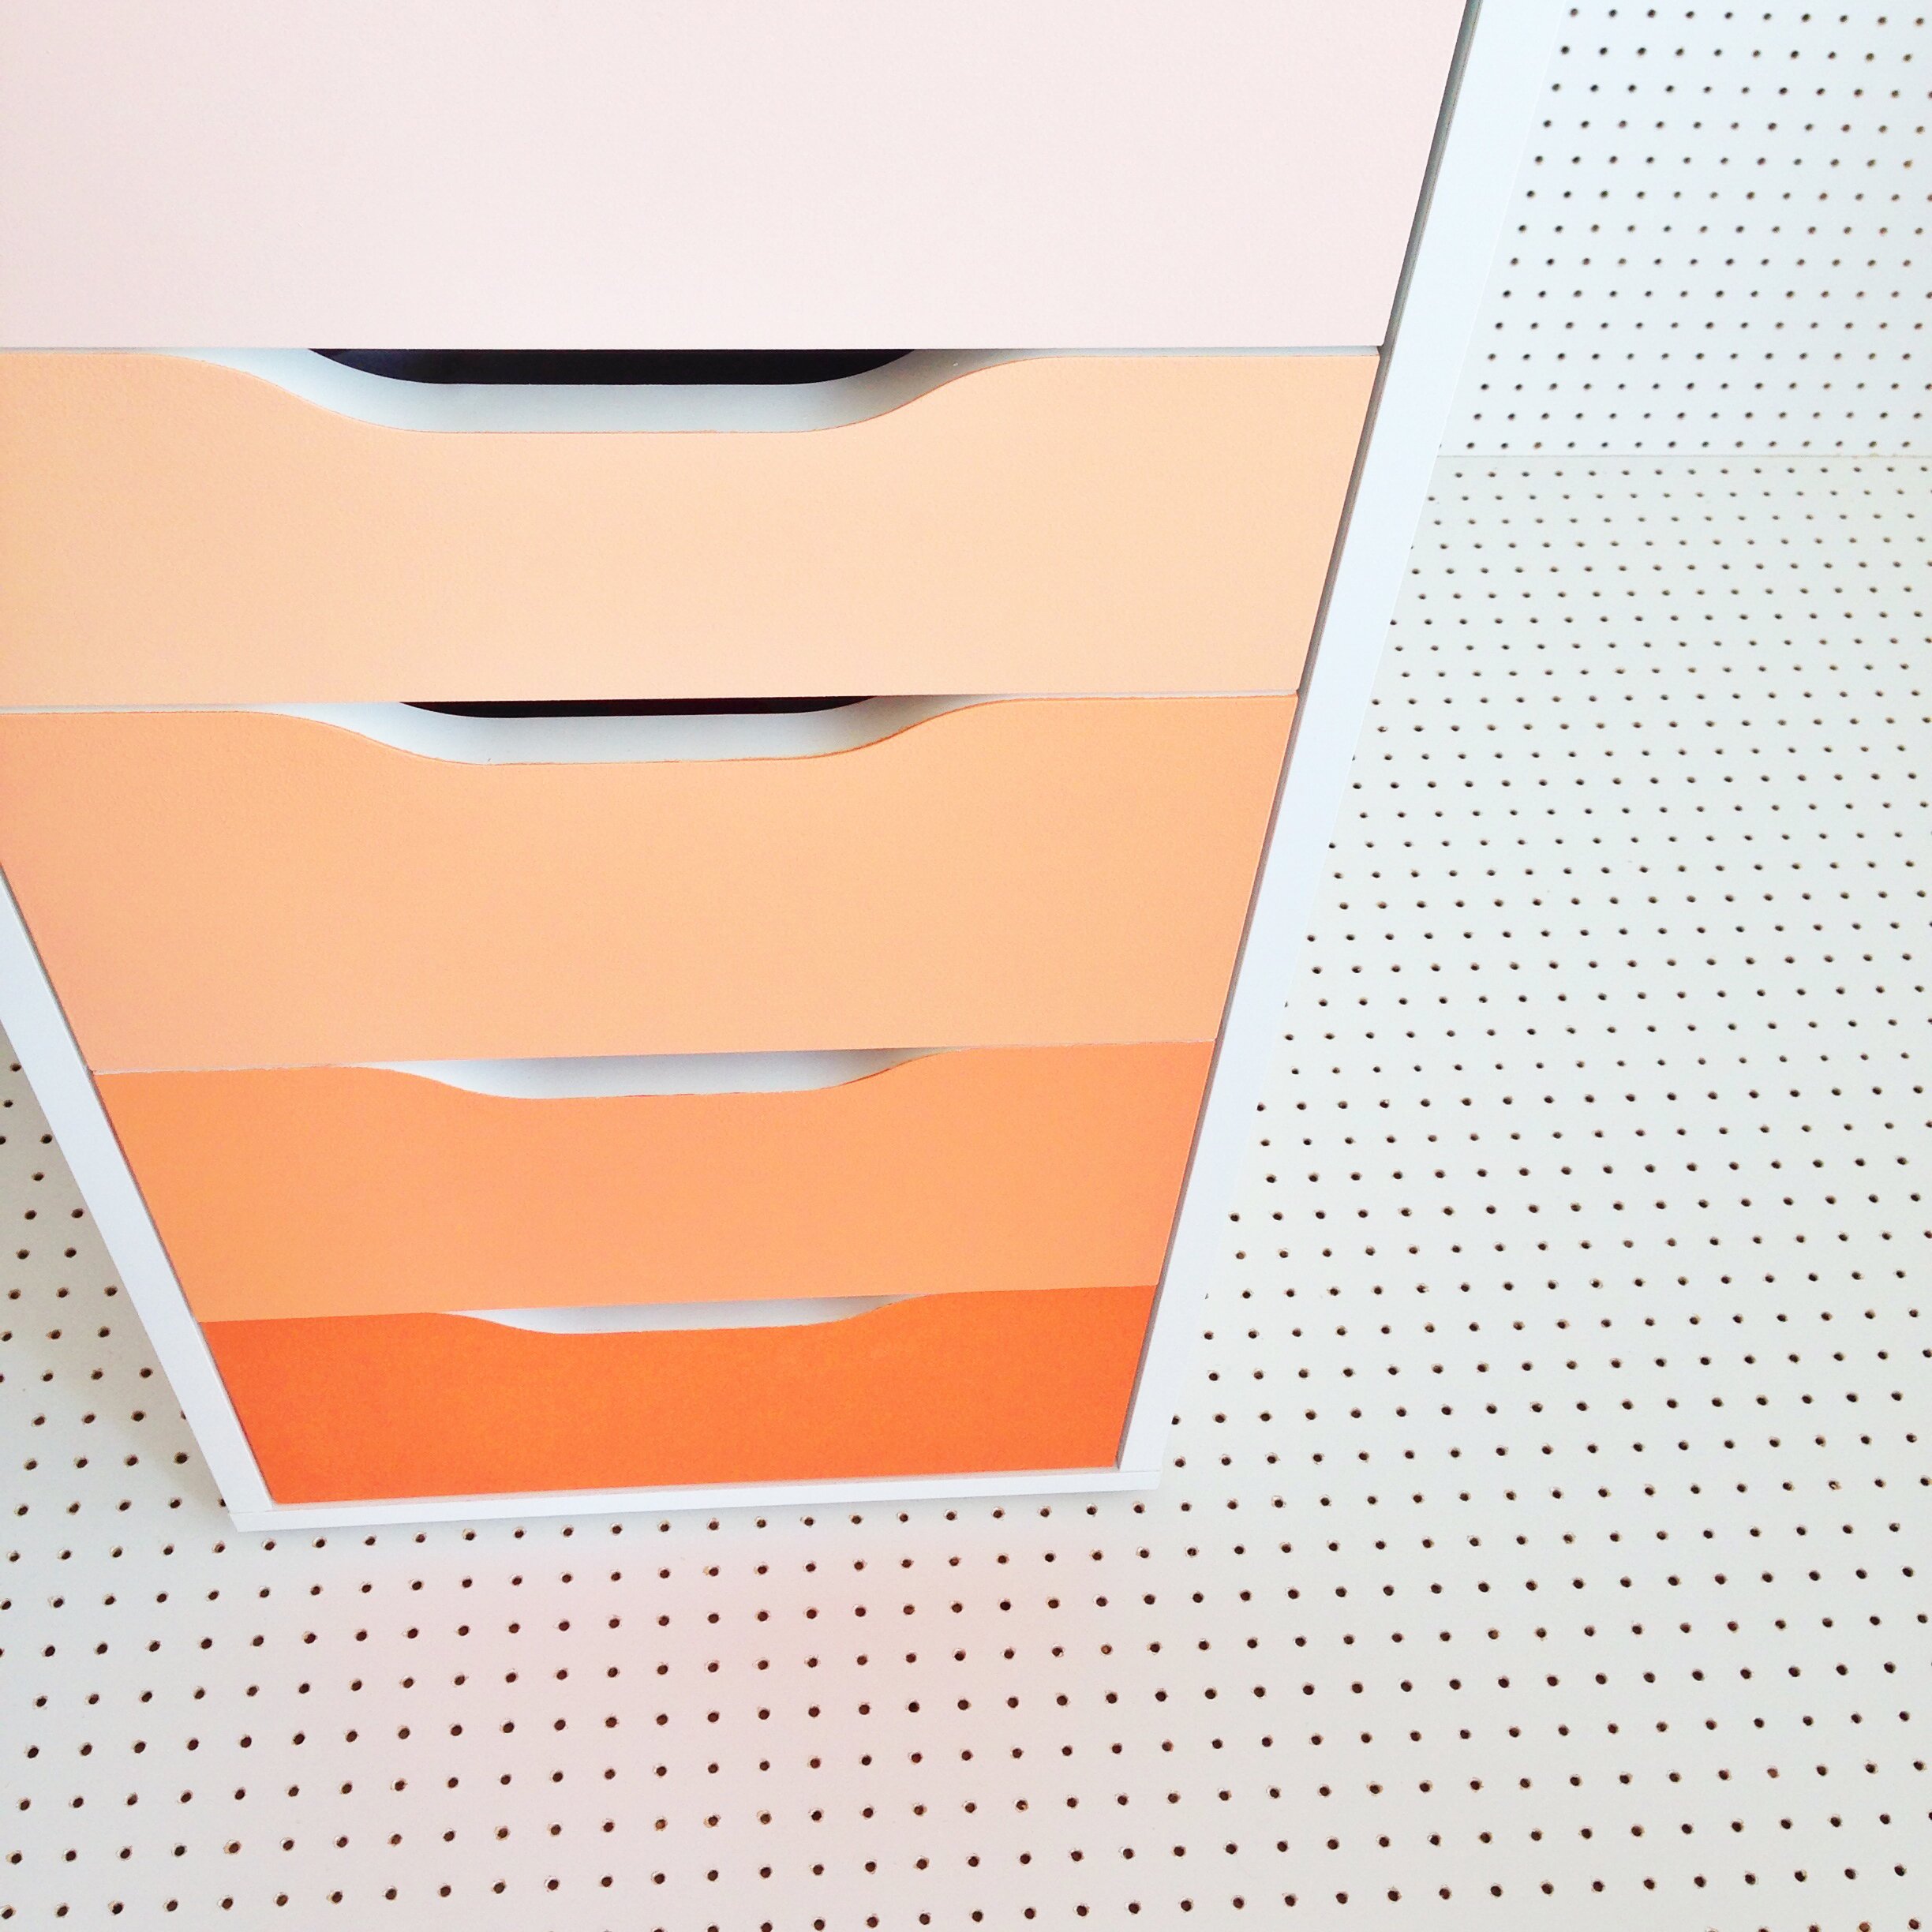
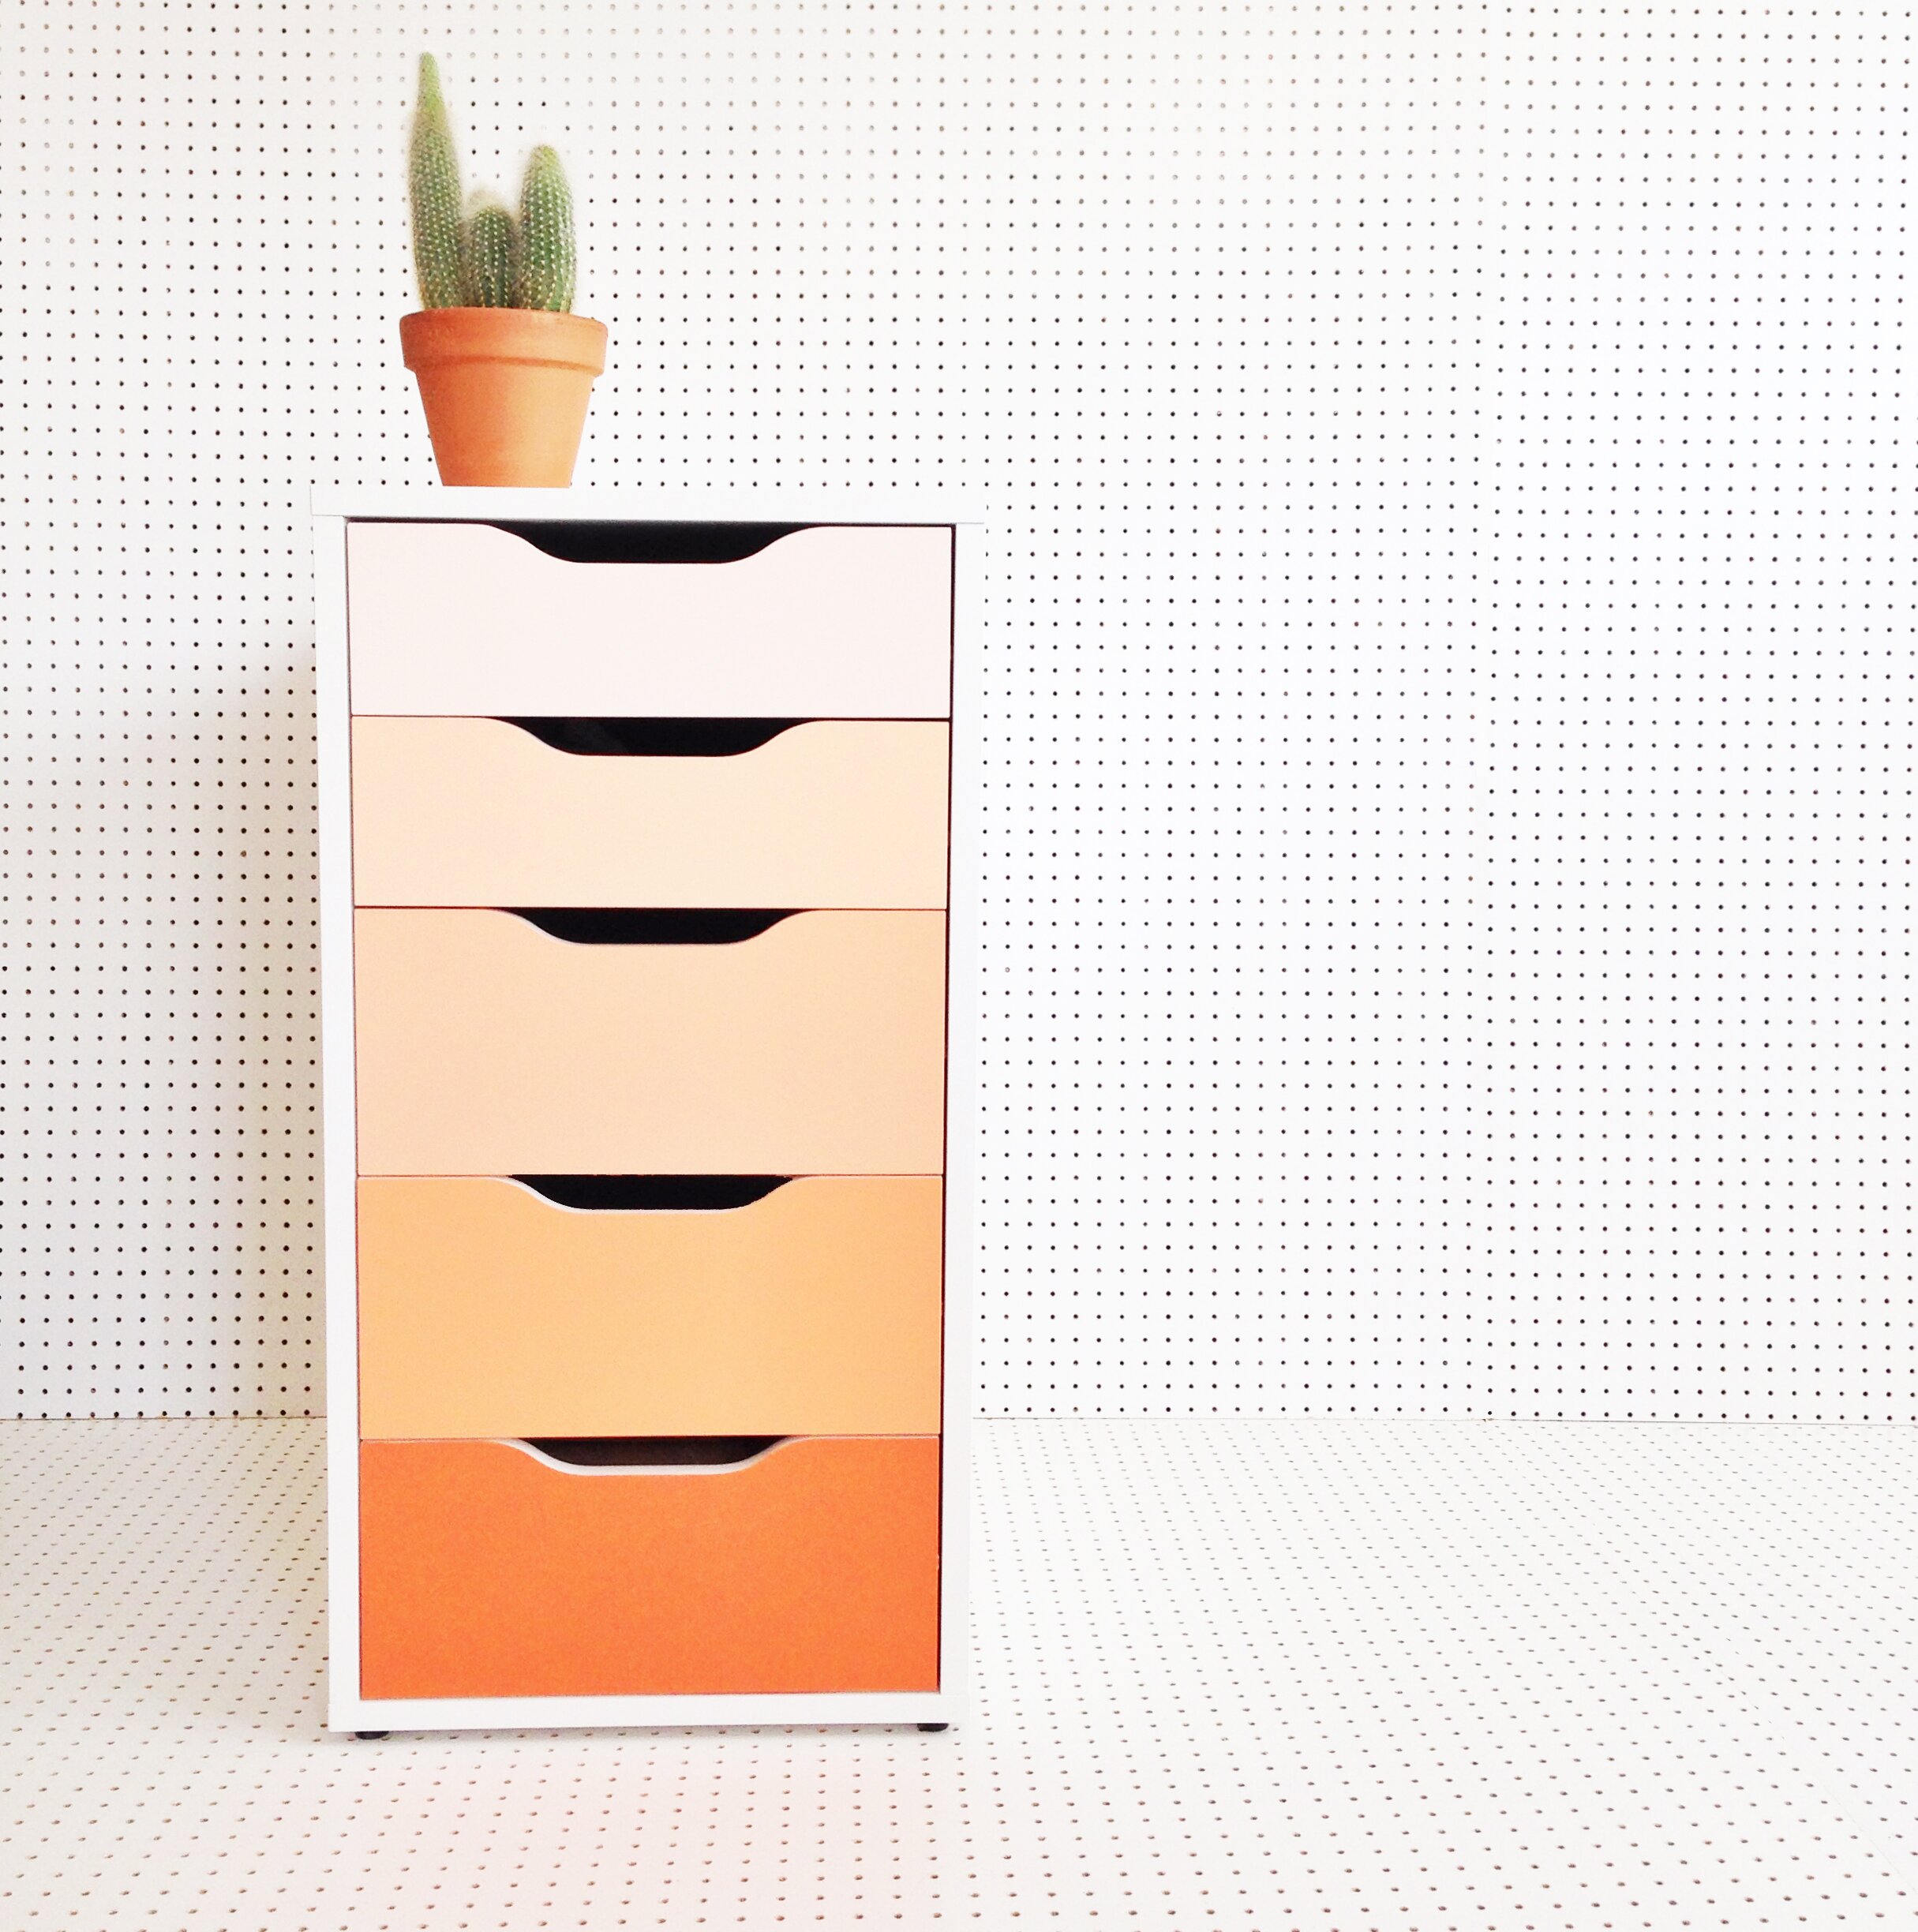
One of the problems I had with my last (tiny) home was there was nowhere for the prints and all my stationery to live. They all had a place but they also had to share the space with lots of other things which wasn’t ideal. One of the first things I bought for the new flat was this Alex drawer unit from IKEA.
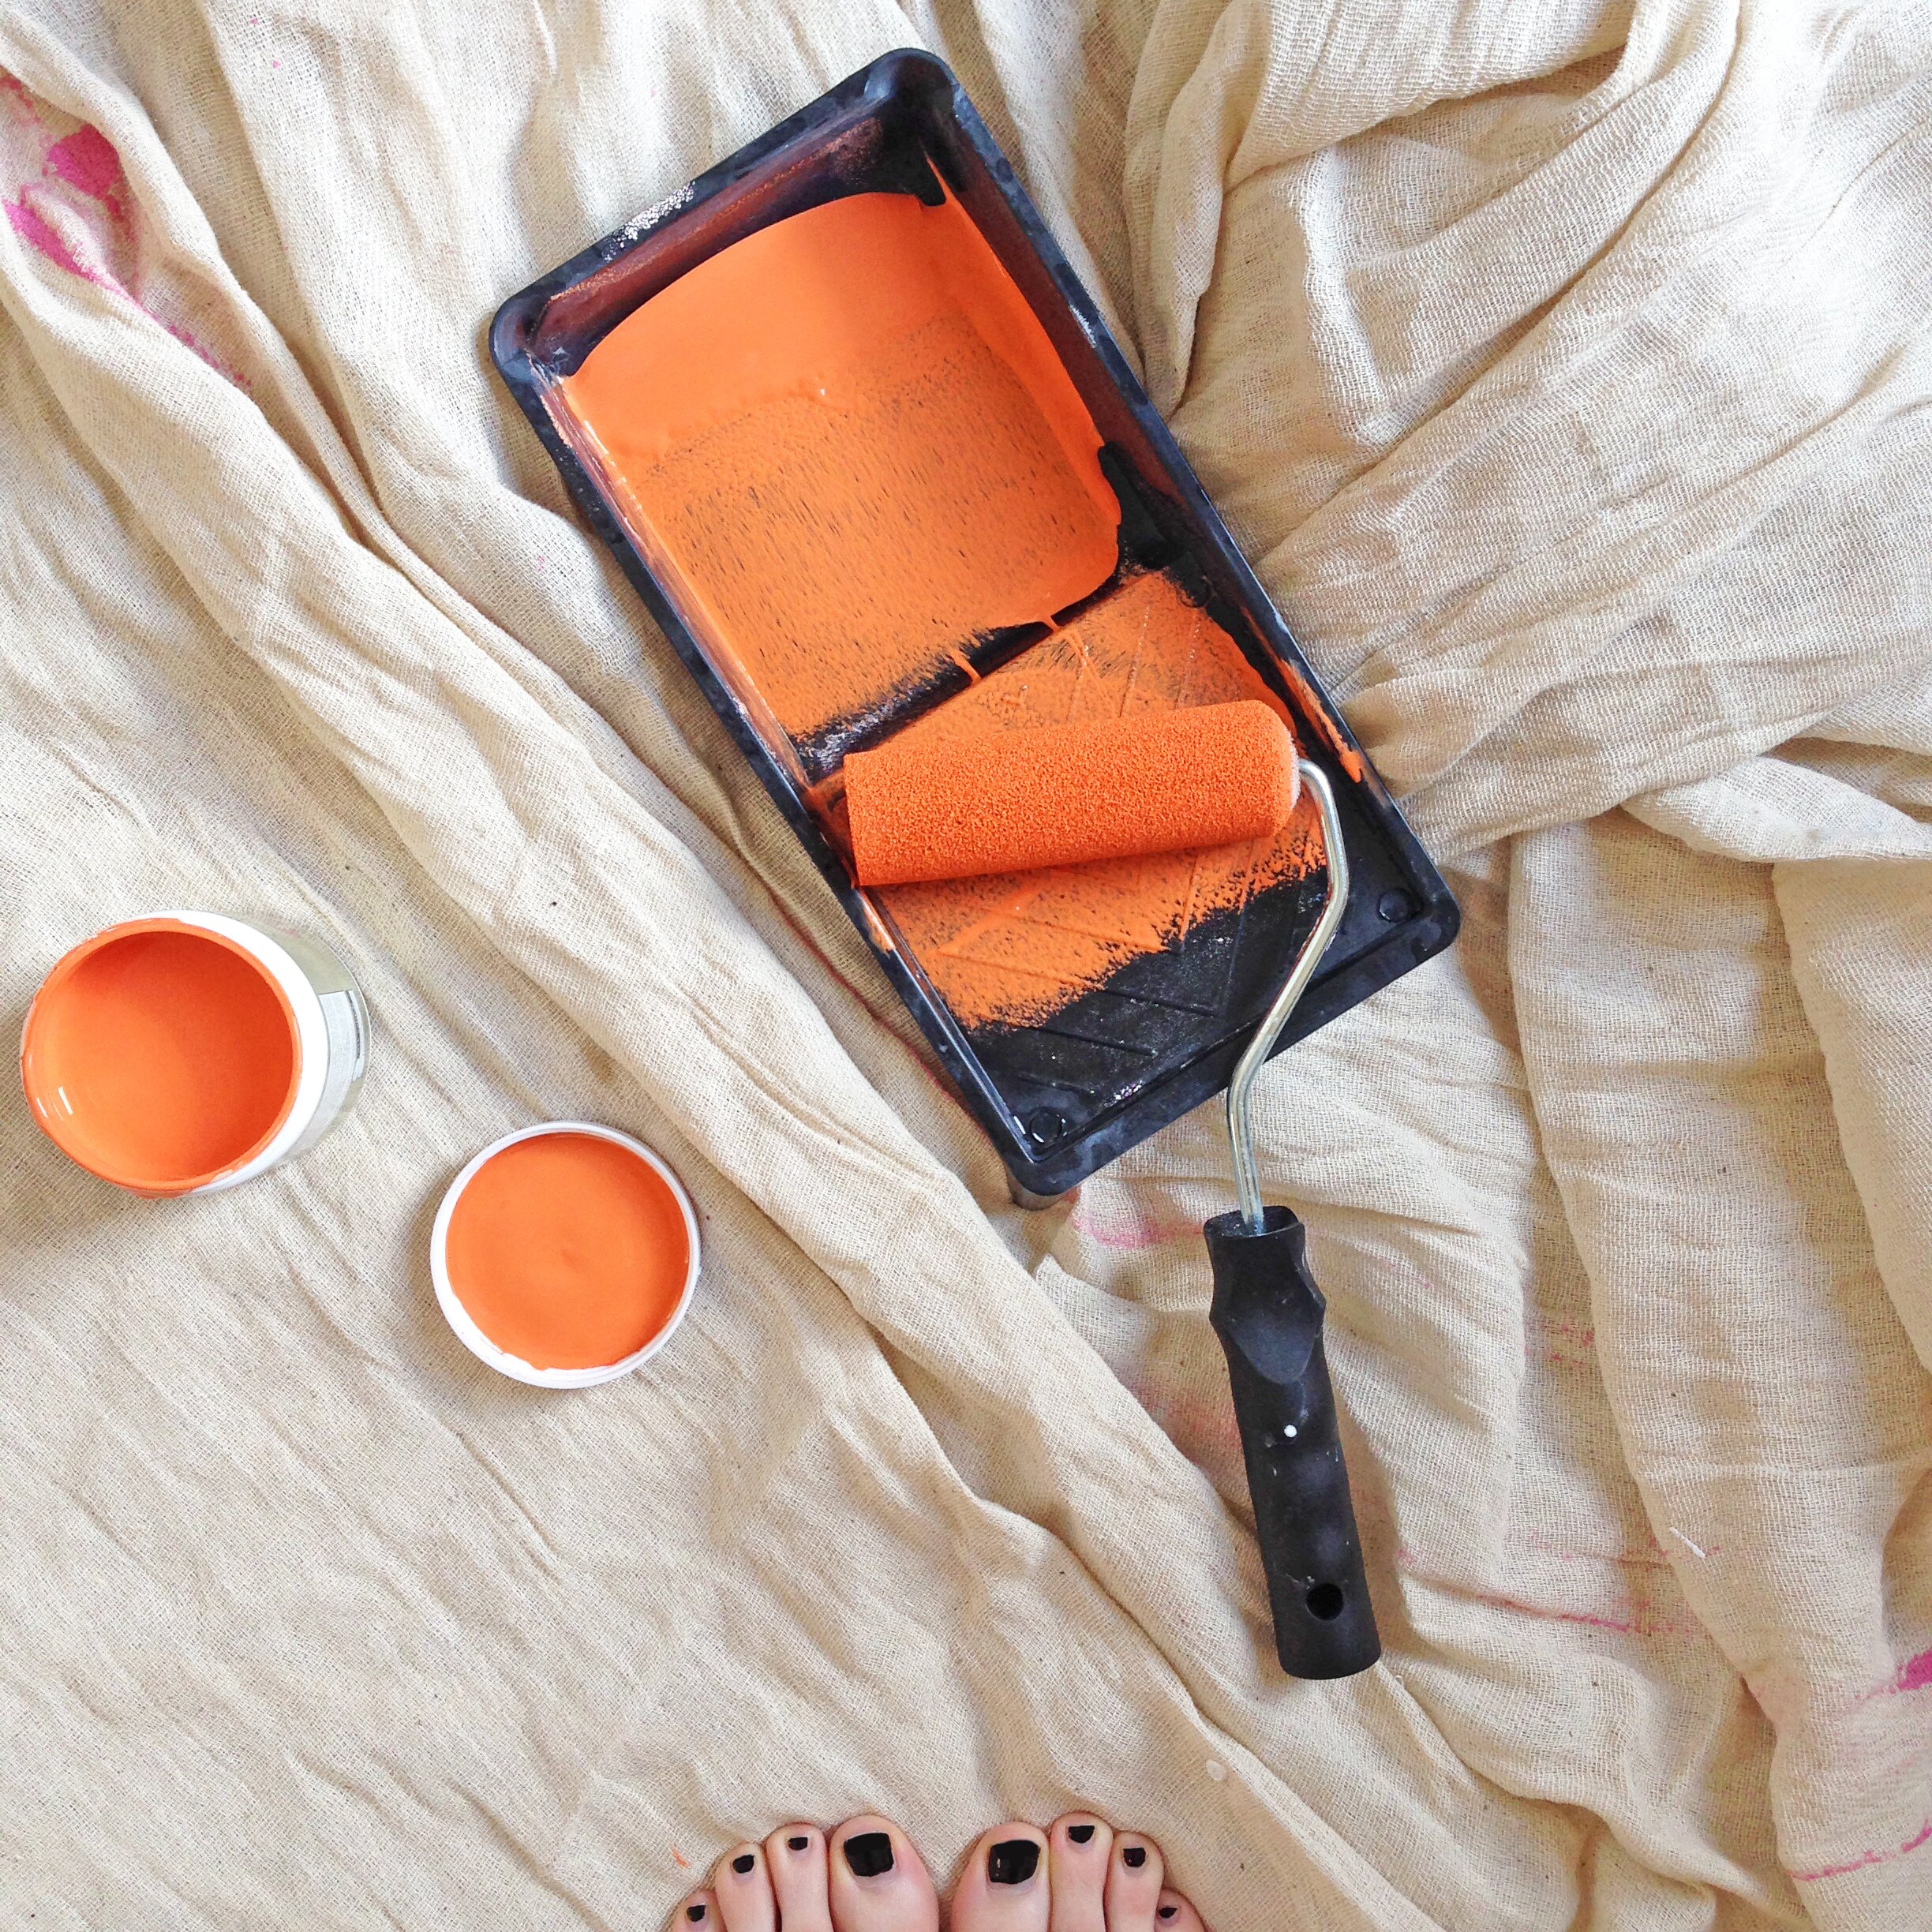
The drawers look good white but of course I wanted to add some colour to them! If you want to try it yourself, here’s what you’ll need:
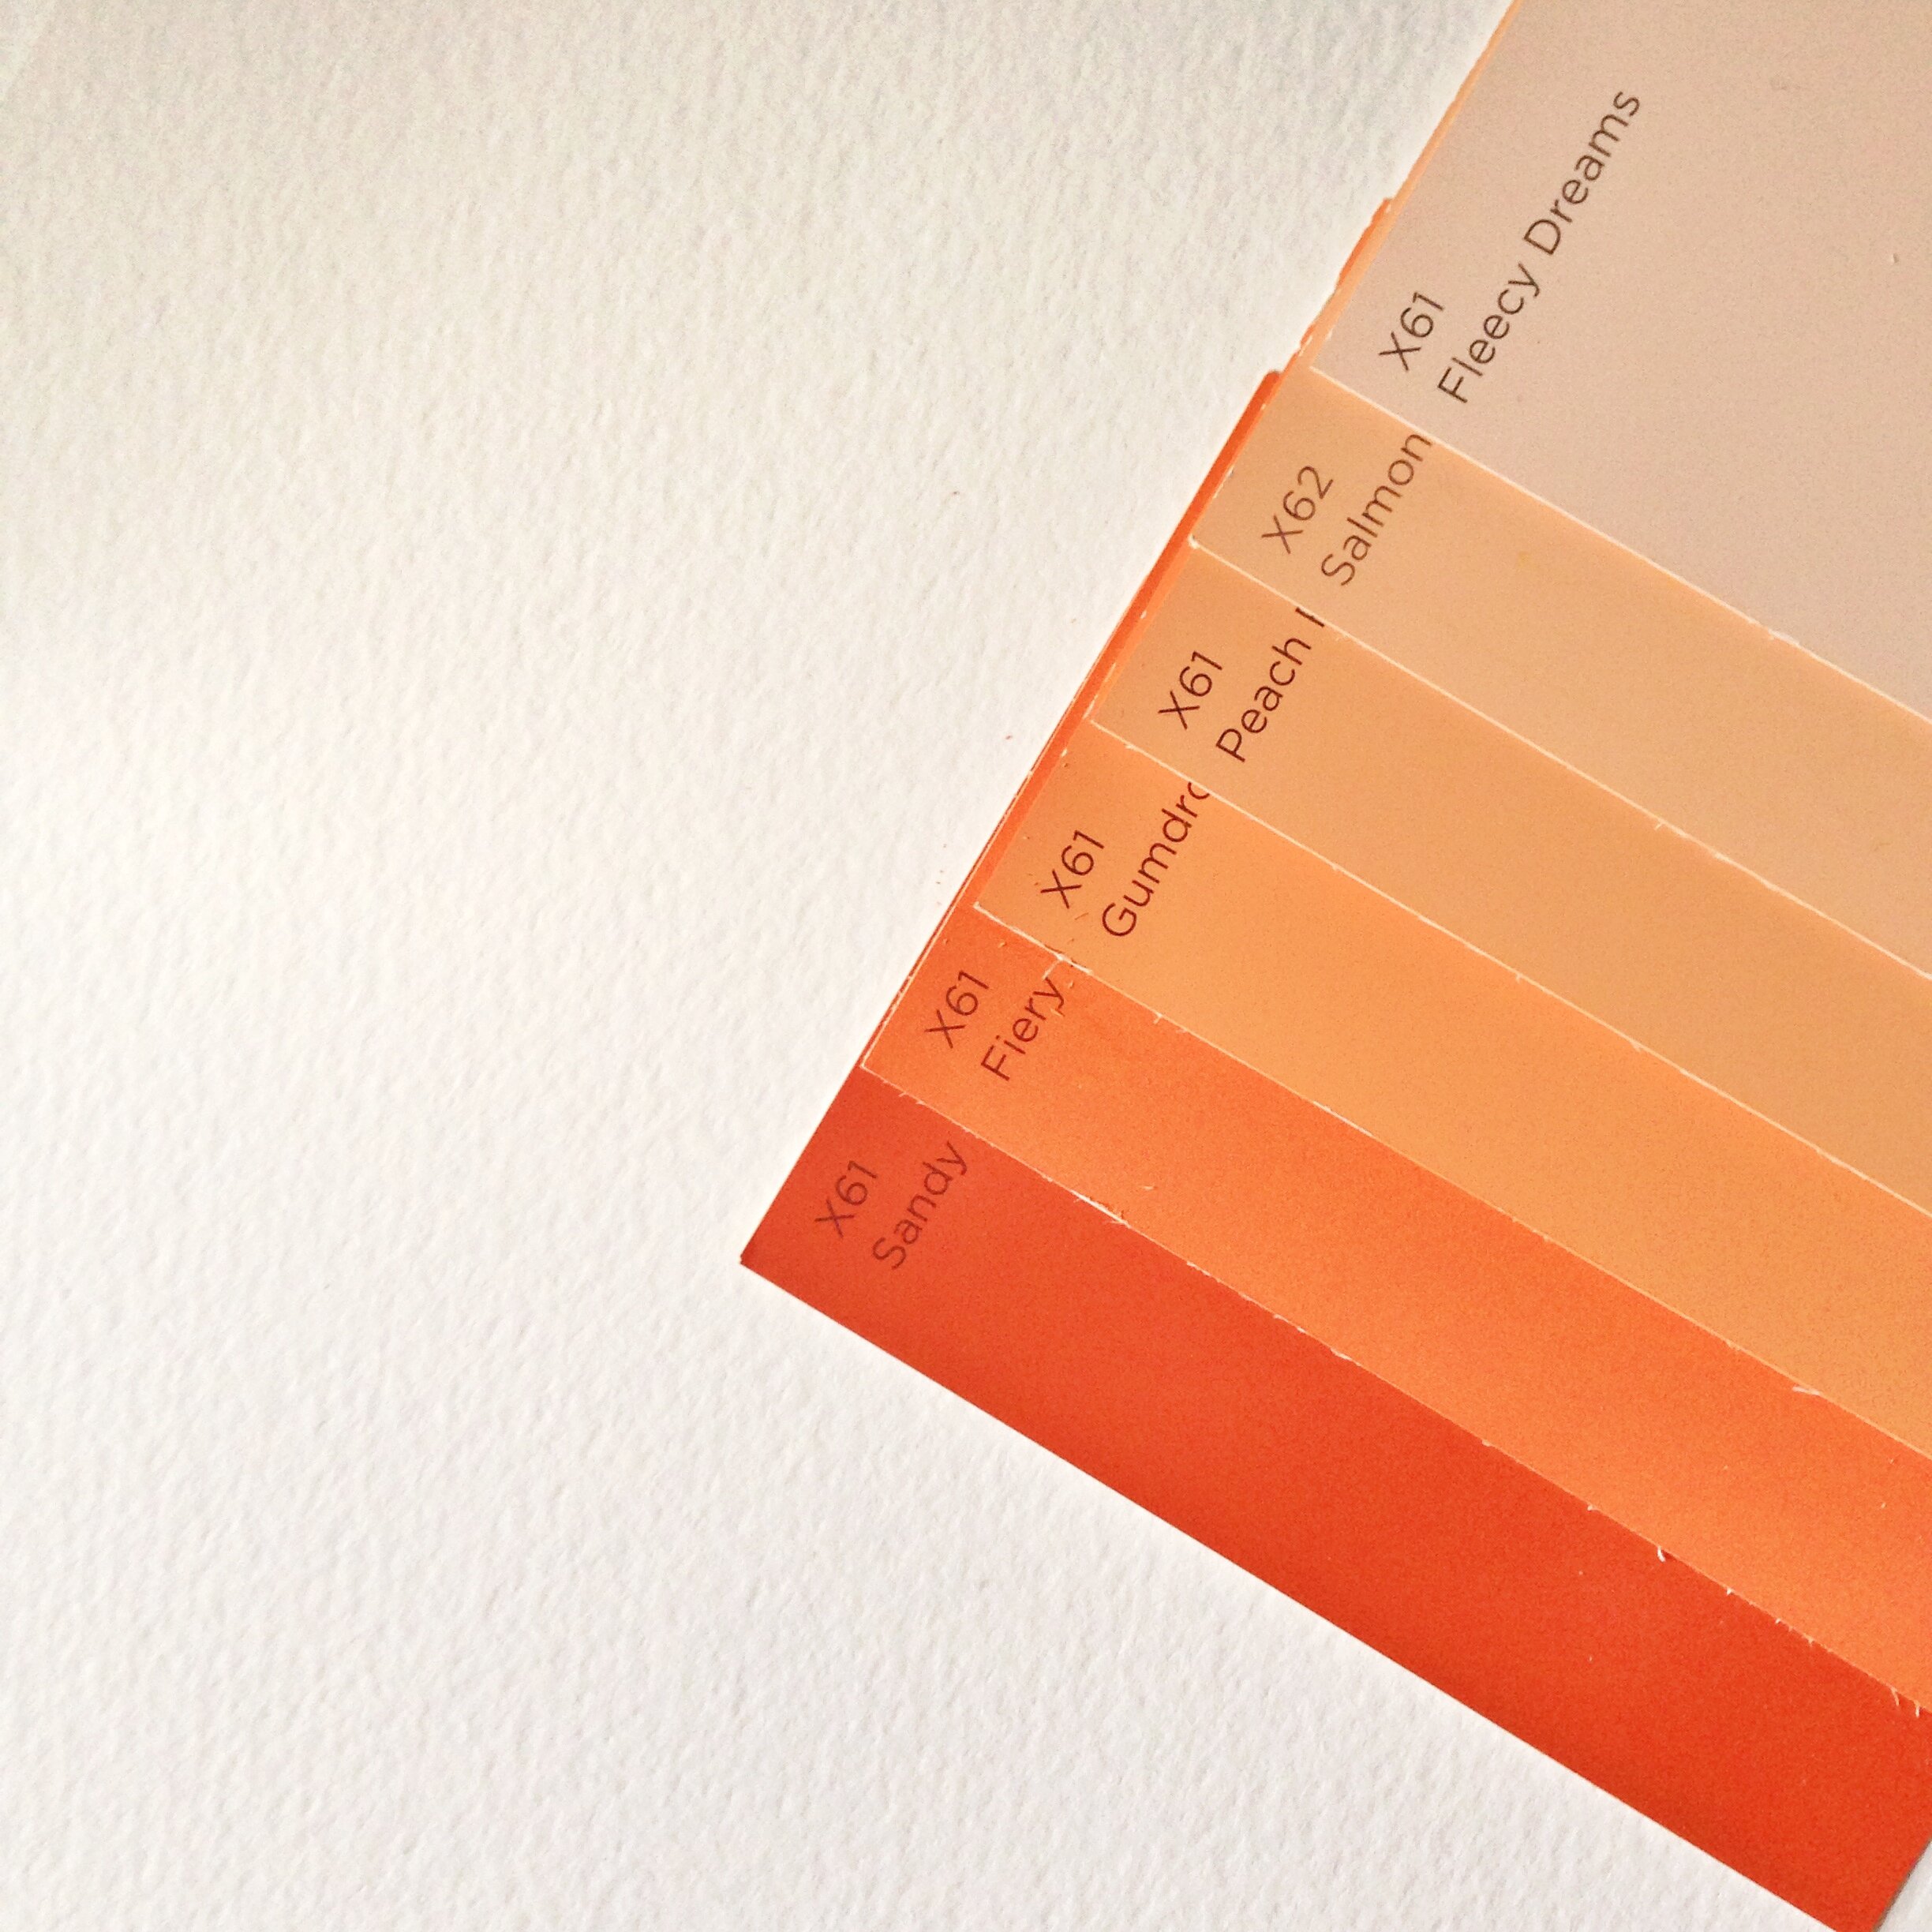
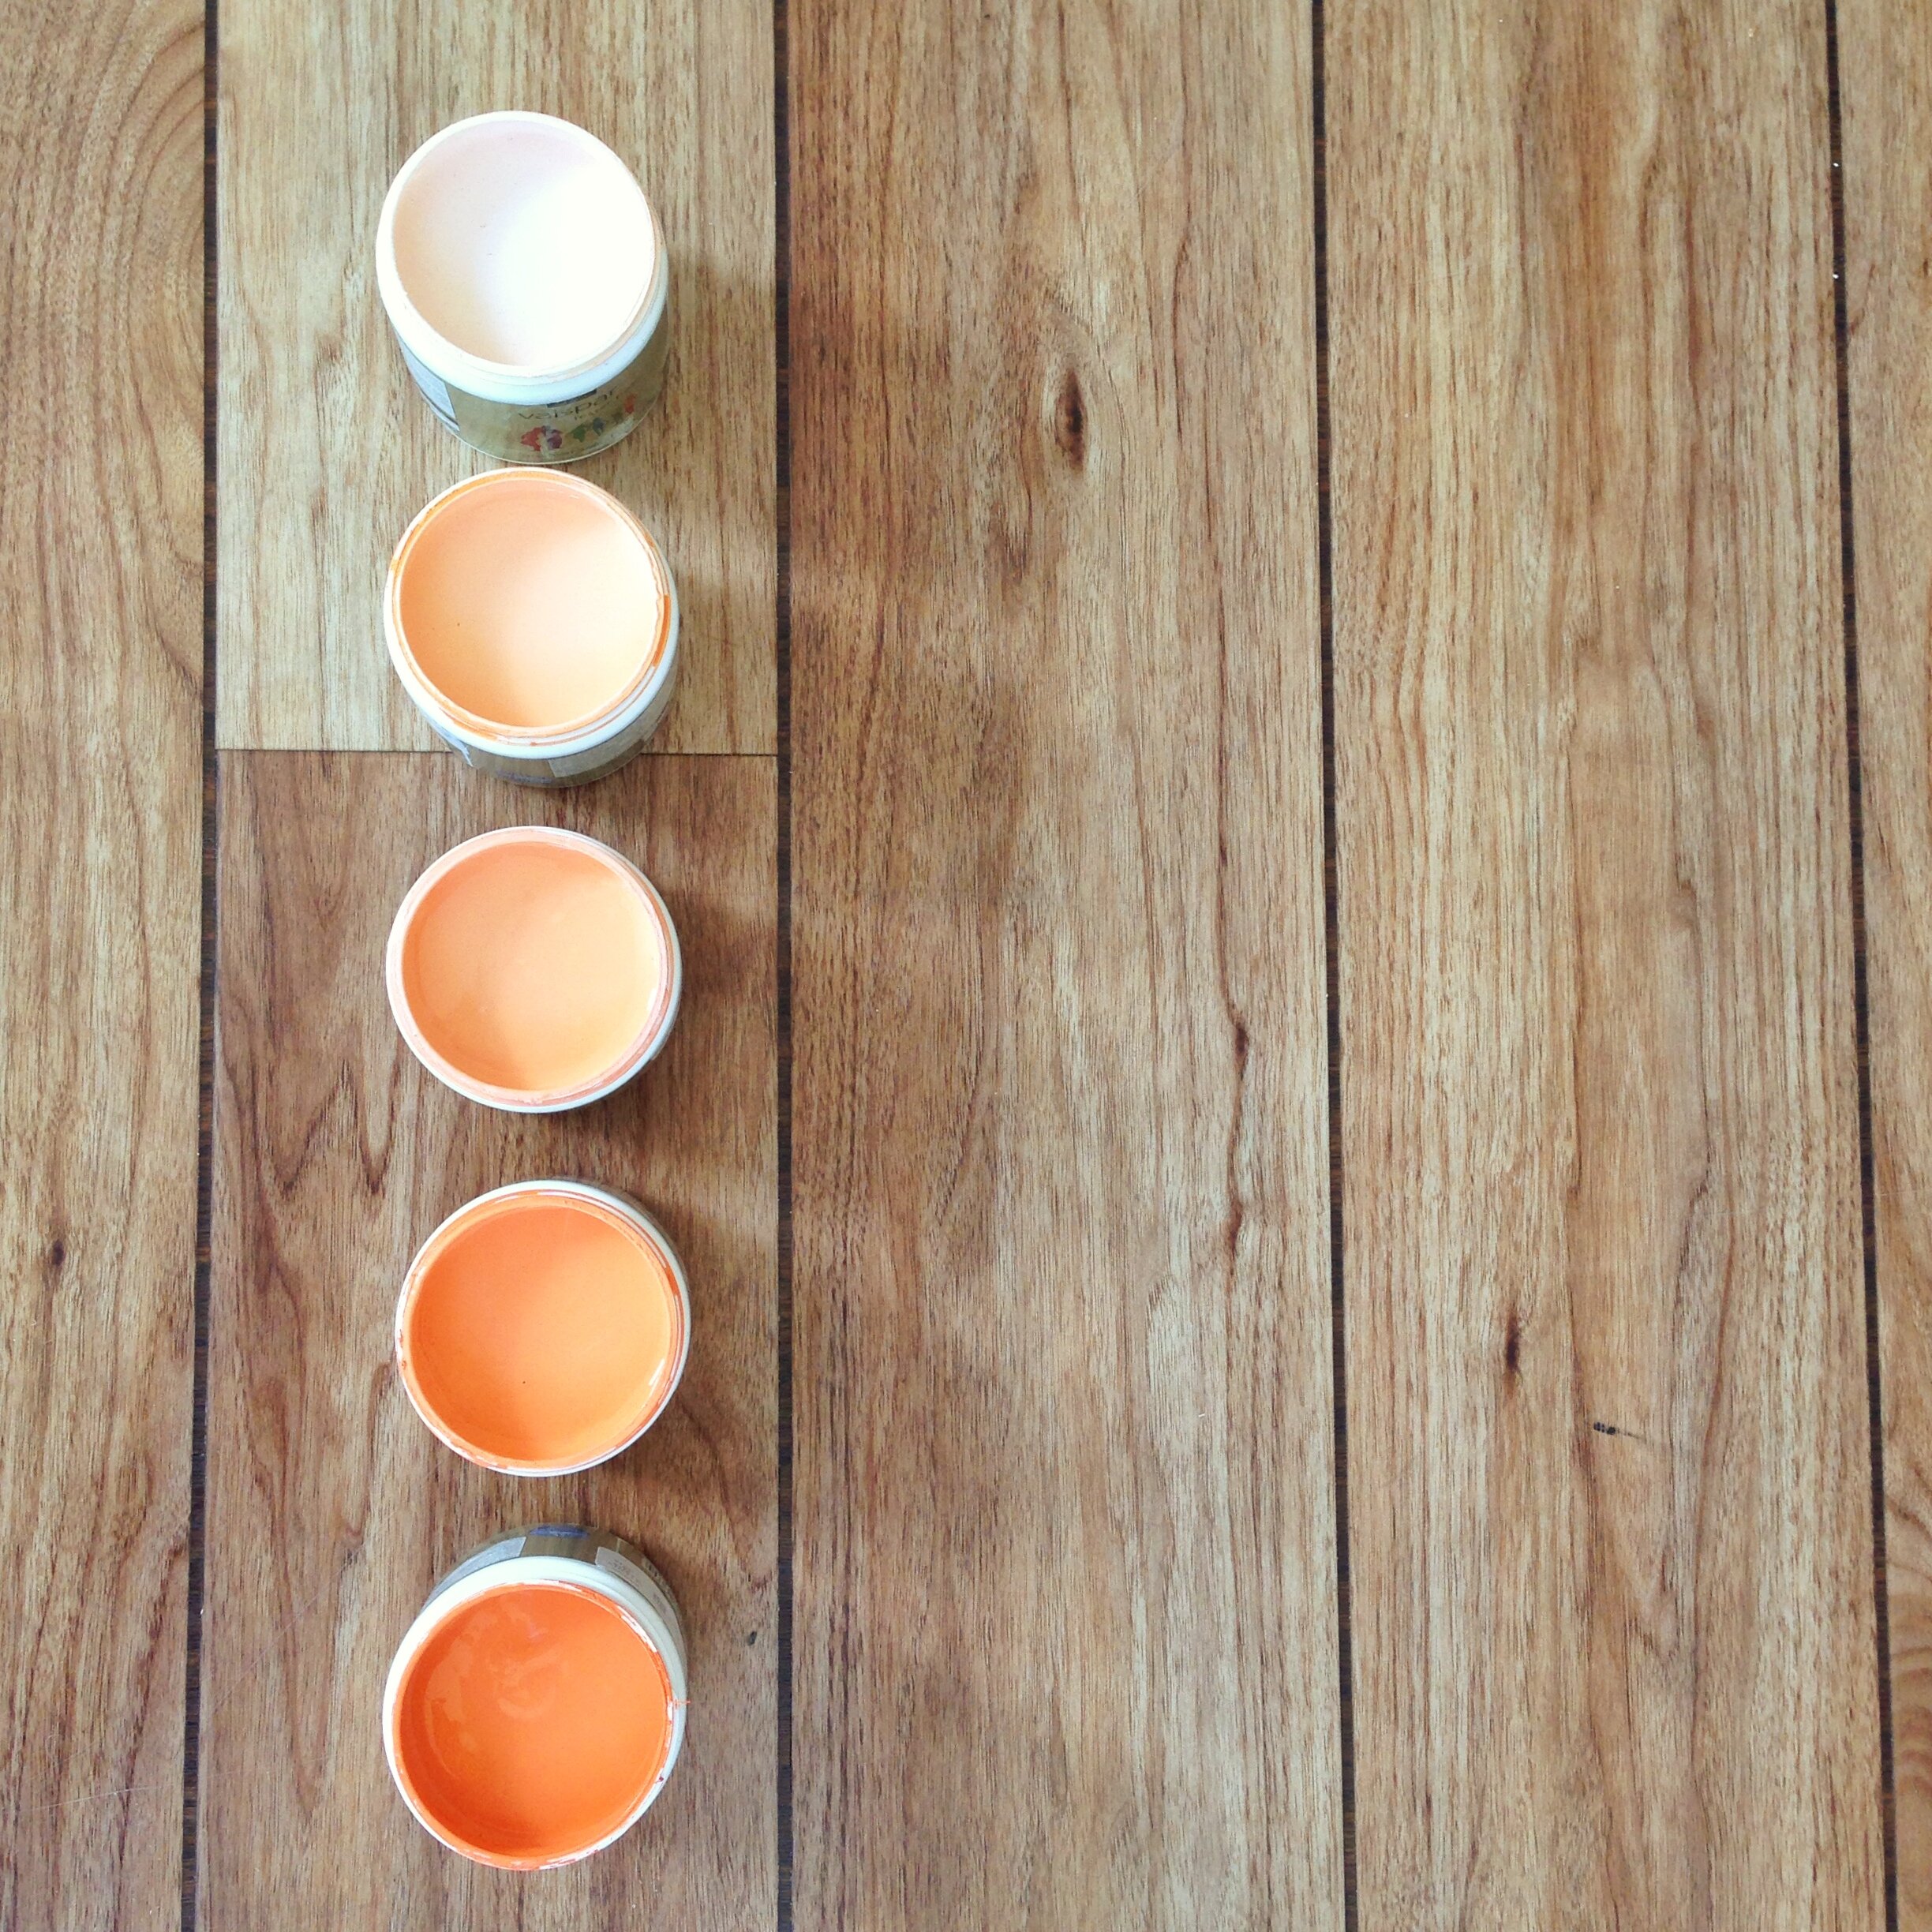
1. Paint. I used tester pots of Valspar paint from B&Q which gave each drawer 2 coats of paint with plenty left over. For the ombré effect, select your colours starting lightest to darkest. The paint colour cards are already arranged in tonal order making it nice and simple to choose.
2. Small paint roller and tray, dust sheet or similar protection for your work surface.
3. Your drawers. I used the smaller Alex model but this idea will work on any drawers, or you could try it on kitchen cabinets, or your indoor/outdoor steps!
Here’s the finished result! Finally, my prints, packaging and stationery have a place to live. Pity they can’t contribute to the rent though.
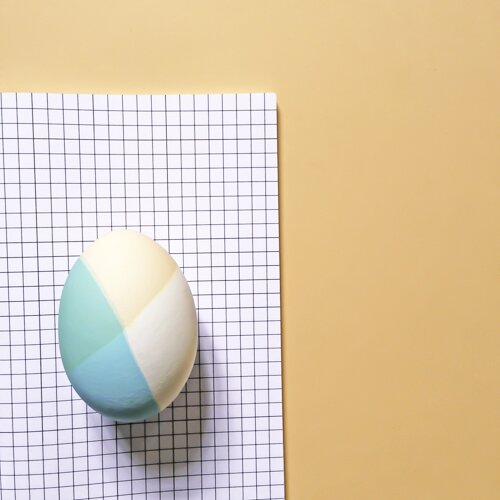
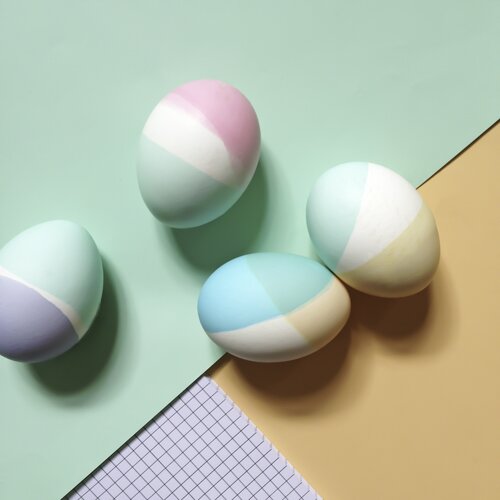
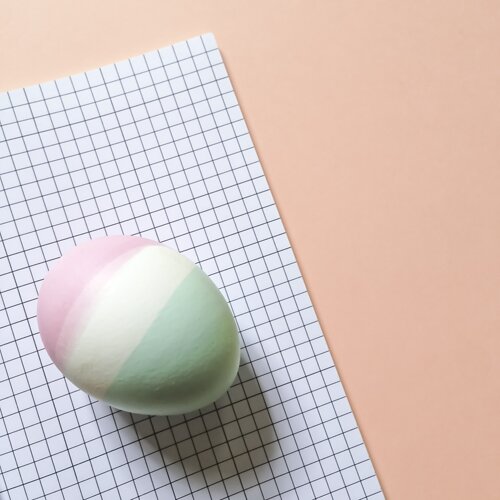
I was recently asked to style some Easter DIYs for Sticky9. I opted for this dip dye egg project adapted from this DIY from Oh Joy. You can find the full project over on the Sticky9 blog.
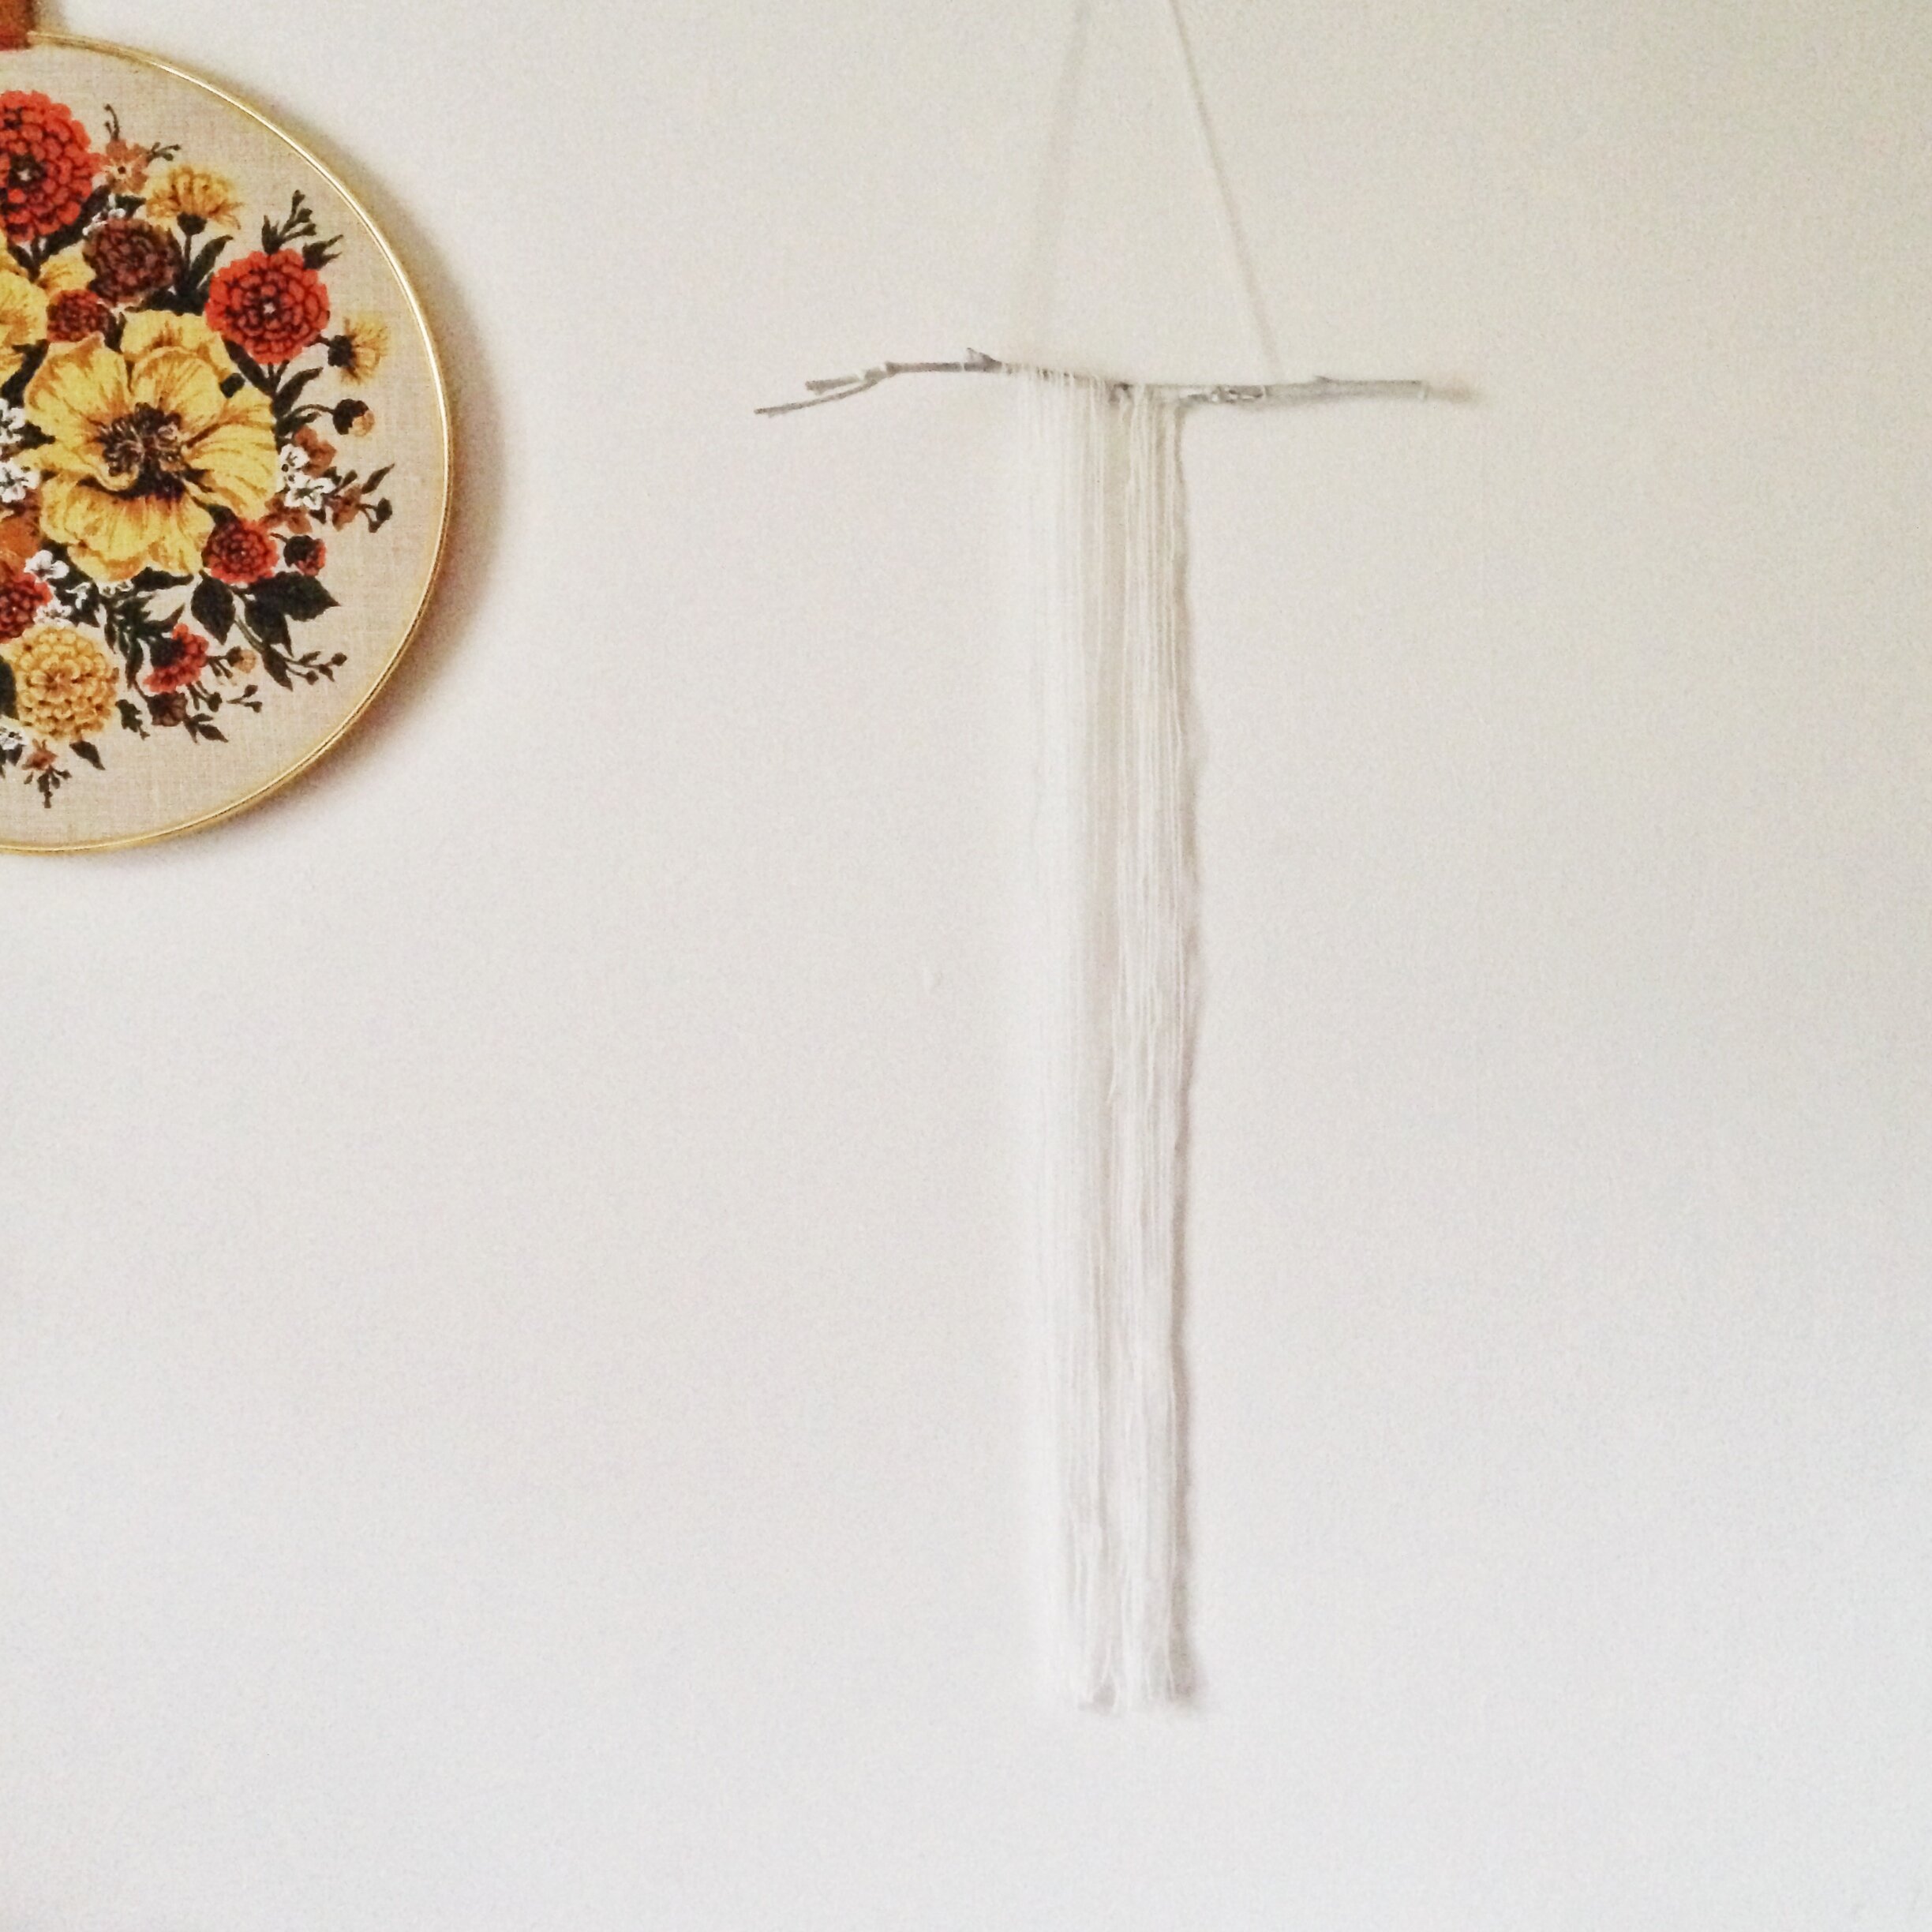
I seem to have amassed a large collection of twigs lately and I wanted to do something with them. I made this wallhanging in about 15 minutes.
You will need:
A small twig/branch
White paint/spray paint
White yarn/thread
PVA glue
Small paintbrush
Scissors
Spray/paint your twig and leave to dry
Cut a length of yarn and attach to either end of the twig to create a hanger. I found it much easier to work on this while it was hung, rather than trying to work on a flat surface.
Cut lengths of yarn to your desired length (mine has a 60cm drop)
Glue the ends of your yarn to the twig. I dabbed a little glue on the yarn, placed on the twig then painted more glue on top to secure
When all your yarn is on the twig, paste a little more glue across the area to secure and set to the twig.