
I love Christmas, but I don’t always love the traditional red and green colour combo. Nor do I always love the endless glitter and foil the high street is trying to get us to fill our homes with every year. This year, I decided to make a minimal, wintry wallhanging to decorate our living space.
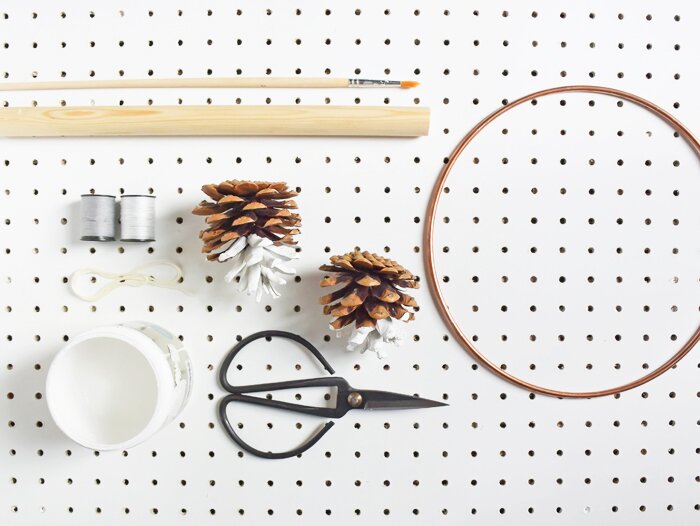
You will need
wooden dowel (mine is 27cm long and 2.5cm thickness)
copper hoop 18cm (I sourced mine here)
pine cones
white paint
paintbrush
thread (sewing thread and thicker embroidery thread or wool/string if you prefer)
scissors
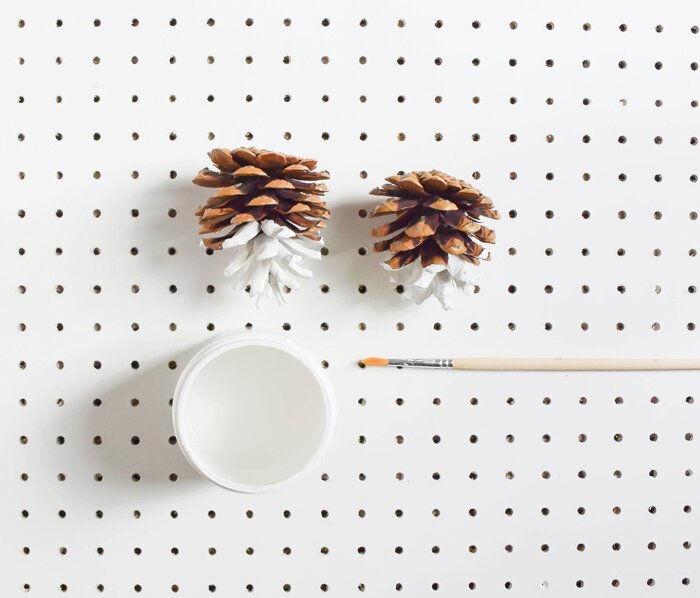
Firstly, paint your pinecones. I’ve used 2 for my wallhanging and gave them a dipped look by painting the top third of each cone white. You can actually dip them in the paint of course but this is a little more messy and will take longer to dry.
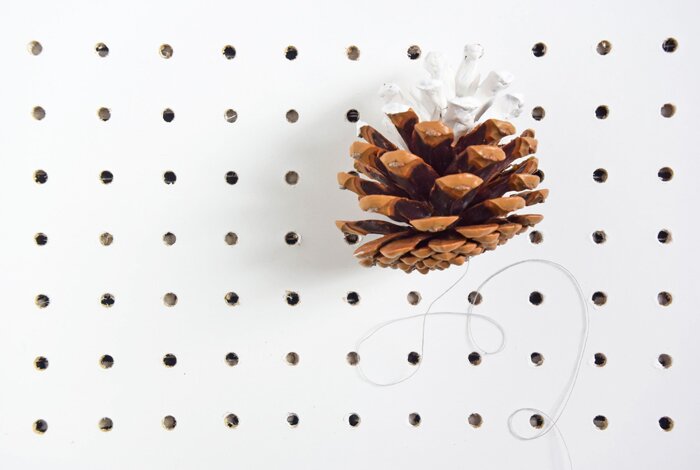
When the cones are dry, take your chosen thread and attach an end to the bottom of each pine cone. Depending on what kind of cones you’re using, this may be really easy or really tricky! I hooked my thread around a few of the scales and tied several knots to secure.

Next, it’s time to tie your copper hoop to the wooden dowel. I secured my hoop a little off centre to make room for the other pine cone but try playing around with your placement to find something that you like and that suits the type and size of the cones. Simply knot and wrap your thread around each piece to secure. I’d recommend using a fairly strong, quality thread so it doesn’t break when a little weight is applied.
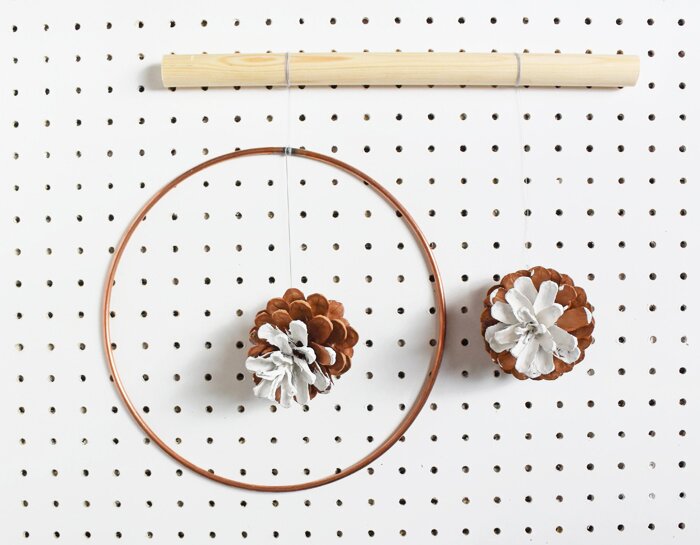
Now it’s time to attach your pine cones. Again, just wrap and knot your thread to the dowel and/or hoop to secure in place. You might find it easier to do this while the structure is hanging up. If so, secure your thicker, embroidery thread/string to the dowel, around 2cm from each end and hang before attaching the cones.

It would be fun to play around with different hanging shapes and different colours for the pine cones. I’m really happy with how this turned out and can’t wait to hang this up in our space every Winter.
0 Comments
1 Pingback